Friday, 29 March 2019

Little ninjas

Hello lovely people,

I was rifling through my box of 'not yet used' stash and spotted these little ninjas that looked like they could do with an inking, so I popped them on my Dies to Die For DT card for this week.

Colourful ninjas birthday card, using Ninja stamps from CC Designs

These guys just make me smile...cutest ninjas ever?!

Top tip...don't forget to buy the matching dies for character stamps because otherwise you end up fussy cutting three ninjas...*sigh*

Colourful ninjas birthday card, using Ninja stamps from CC Designs

It was so simple to layer up different coloured panels behind the Blueprints die and I love how it gives a cartoon vibe to the design.

Colourful ninjas birthday card, using Ninja stamps from CC Designs

If I've tempted you with any of the lovely supplies I've used then you can go straight to the individual products via the links below or just pop over to Dies to Die For and have a little browse around!

Thanks for popping in and I hope you have an awesome day!


Lovely things I've used from Dies to Die For;
Ninjas - CC Designs (I recommend the matching dies also!)
Polka dot parade 6x6 paper pad - Sunny Studio
A2 stitched rectangle STAX 1 - My Favorite Things
Blueprints 27 - My Favorite Things
Happy Birthday line border - Lawn Fawn 

Copic colours;
Skin: E50, E51, E21, E11
Ninja outfits: N6, N7, N10, 100 plus N5 for the highlights
Green belt: YG03, YG25, YG17
Red belt: R24, R27, R46
Blue belt: B02, B04, B06

Friday, 22 March 2019

Dino party!

Hello lovely people,

Just popping in with my Dies to Die For DT card and there's a party happening today...a dinosaur party!

Handmade dinosaur birthday party card, using Rawrsome stamps and dies by Lawn Fawn

I created a very slightly 3D scene for my dinosaurs but not too 3D so it can still go in the post as a standard letter!

How adorable are these dinos in their party hats?!

Handmade dinosaur birthday party card, using Rawrsome stamps and dies by Lawn Fawn

If I've tempted you with any of the lovely supplies I've used then you can go straight to the individual products via the links below or just pop over to Dies to Die For and have a little browse around!

Thanks for popping in and I hope you have a fabulous day!


Lovely things I've used from Dies to Die For;
Rawrsome stamps - Lawn Fawn
Rawrsome dies - Lawn Fawn
Stitched arch STAX - My Favorite Things
Large dotted square stackables - Lawn Fawn
Grassy hills die - My Favorite Things

Other ingredients;
Distress oxide in Salty ocean

Copic colours;

Blue dinosaur: B01, B02, B04, B05
Blue dino horns: B06, B37
Blue dinosaur frill: YG03, YG25, YG17
Red dinosaur: R24, R27, R46, R39
Red dinosaur plates: Y38, YR04, YR68
Orange dinosaur: Y38, YR04, YR16, YR68
Orange dinosaur spots: B02, B04, B05
Hats: combos as above

Friday, 8 March 2019

Eek! It's your birthday!

Hello lovely people,

Apologies for the lack of card last week but I was off skiing in the French Alps with friends and family, including taking my niece and nephew for the first time.  I'm happy to report that we did loads of skiing, there were no injuries, the weather was sunny and the kids loved it :-)

One great thing about coming home is being back at my craft desk and for this week's Dies to Die For DT card I was desperate to have a play with some rather cute mice that fell in my basket last month!

Birthday card with cute mouse in a present box and bunting (stamps are It's a Mice Time to Celebrate by MFT)

Polka dots, stripy bunting and an adorable mouse in a box...what more could you want for a birthday card?!

Birthday card with cute mouse in a present box and bunting (stamps are It's a Mice Time to Celebrate by MFT)

I love how happy this mouse looks :-)

It reminds me of the time that I came home from work one day and Dr. Hubby was hiding in a box (a very large box).  I went all round the house trying to figure out where he was and it took me a looooong time to realise he was in the huge box in our lounge!  So maybe that backfired a bit on him as he was in there for quite a while - lol!

Birthday card with cute mouse in a present box and bunting (stamps are It's a Mice Time to Celebrate by MFT)

If I've tempted you with any of the lovely supplies I've used then you can go straight to the individual products via the links below or just pop over to Dies to Die For and have a little browse around!

Thanks for popping in and I hope you have a wonderful day!


Lovely things I've used from Dies to Die For;
It's a mice time to celebrate - My Favorite Things
Dots and stripes pastels 6x6 pad - Sunny Studio
Blueprints 31 - My Favorite Things
Double stitched circle STAX - My Favorite Things (not available but check out all the other fab circle STAX here)
Bunting borders - Lawn Fawn

Copic colours;
Mouse: C00, C1, C3
Ears: R0000, R000, R00, R30
Pink bits: RV52, RV55, RV17
Blue bits: B000, B00, B01, B02
Ground: C00, C0, C1, C2, C3

Friday, 22 February 2019

Birthday cake with sass

Hello lovely people,

Sometimes I feel like stamping and sometimes I feel like die cutting...and today for my Dies to Die For DT card I've gone with die cutting.

Handcrafted birthday cake card with sassy greeting (using Birthday cake die-namics and Sassy Pants birthday greetings from MFT)

I love how well this birthday cake die pairs with the Sassy Pants greetings :-)

Handcrafted birthday cake card with sassy greeting (using Birthday cake die-namics and Sassy Pants birthday greetings from MFT)

An oh, the different colour combos you could choose for this cake...so many possibilities!

I've put some Nuvo drops in the holes of the black layer, but you could add different coloured card behind or leave it with the white showing through.

Handcrafted birthday cake card with sassy greeting (using Birthday cake die-namics and Sassy Pants birthday greetings from MFT)

If I've tempted you with any of the lovely supplies I've used then you can go straight to the individual products via the links below or just pop over to Dies to Die For and have a little browse around!

Thanks for popping in and I hope you have a fabulous day!


Friday, 15 February 2019

3 ways with a pretty floral wreath stamp

Hello lovely people,

I'm bringing you a triple whammy for my Dies to Die For DT inspiration this week!

Isn't it great when a stamp and/or die set inspires you so much that you instantly have a trillion ideas for how you want to use it?

That's how I felt when I saw this beautiful stamp and die set from Pretty Pink Posh, so I wanted to showcase just a few ways to use it :-)

Handcrafted cards and tags with pretty floral wreath (stamps/dies are Floral Hearts by Pretty Pink Posh)

For this card I stamped the outer wreath and central element onto separate pieces of white stamping card and coloured them.

Then I cut the outer wreath into a square and layered the central piece into the middle using foam pads.

Handcrafted cards and tags with pretty floral wreath (stamps/dies are Floral Hearts by Pretty Pink Posh)

I've used both the outer wreath and central element for this second card as well, but stamped them both on the same piece of stamping card, then coloured them and cut the whole thing out with the outer edge die.

Again, I've layered the piece onto the card with foam pads for dimension and this time I've added one of the little sentiments underneath.

Handcrafted cards and tags with pretty floral wreath (stamps/dies are Floral Hearts by Pretty Pink Posh)


Finally, for my tag I stamped just the outer wreath, coloured it and cut out with the wreath die.

I stamped a sentiment onto the tag and layered the wreath over it using, yes you guessed it, foam pads!

Handcrafted cards and tags with pretty floral wreath (stamps/dies are Floral Hearts by Pretty Pink Posh)

As you can see, I kept the designs simple because my main aim was to show some different ways to use the stamps/dies...oh, and because I like it CAS - lol!

There are even more ways to use this set but I think that's quite enough for now!

If I've tempted you with any of the lovely supplies I've used then you can go straight to the individual products via the links below or just pop over to Dies to Die For and have a little browse around!

Thanks for popping in and I hope you have a beautiful day!


Friday, 8 February 2019

The cutest chemists EVER!

Hello lovely people,

I was excited to do some crafting in my newly rearranged craft room (see my previous post if you're curious!) and took the opportunity to colour up some fabulous MFT stamps for my Dies to Die For DT card this week.

Valentine's Day card using MFT Cute Chemists

I've stamped the pair of cuties next to each other and stamped some of the hearts above the beakers/test tube.

I've coloured this pair up as if they were me and Dr. Hubby, with our favourite colour tops and shoes ...shhhh, this is his Valentine's Day card!

Valentine's Day card using MFT Cute Chemists

My main problem when designing this card was which of the punny sentiments to use as I love them all and I knew each and every one would make Dr. Hubby giggle...so, a good problem to have really - lol!

Valentine's Day card using MFT Cute Chemists

If I've tempted you with any of the lovely supplies I've used then you can go straight to the individual products via the links below or just pop over to Dies to Die For and have a little browse around!

Thanks for popping in and I hope you have a super day!


Lovely things I've used from Dies to Die For;
BB Cute chemists - My Favorite Things
Sweet stack 6x6 paper pad - My Favorite Things
Fancy frames squares - Sunny Studio


Other ingredients;
twine - from stash

Copic colours;

Skin: E50, E51, E21, E11
Girl's hair: E55, E57, E59
Boy's hair: E53, E35, E37
Girl's trousers: T2, T3, T4, T5
Boy's trousers: T3, T4, T5, T6
Lab coats: C00, T1
Green bits: YG03, YG25, YG17
Pink bits: R81, R83, R85
Aqua bits: B00, BG53, BG57
Purple bits: BV000, BV00, BV01, BV02
Glass: T1, T2
Ground: C00, T1, T2, T3, T4

Sunday, 3 February 2019

Craft room rearrangement 2019!

Hello lovely people,

I had a fantastic day yesterday rearranging my craft room and it's now so much better :-)

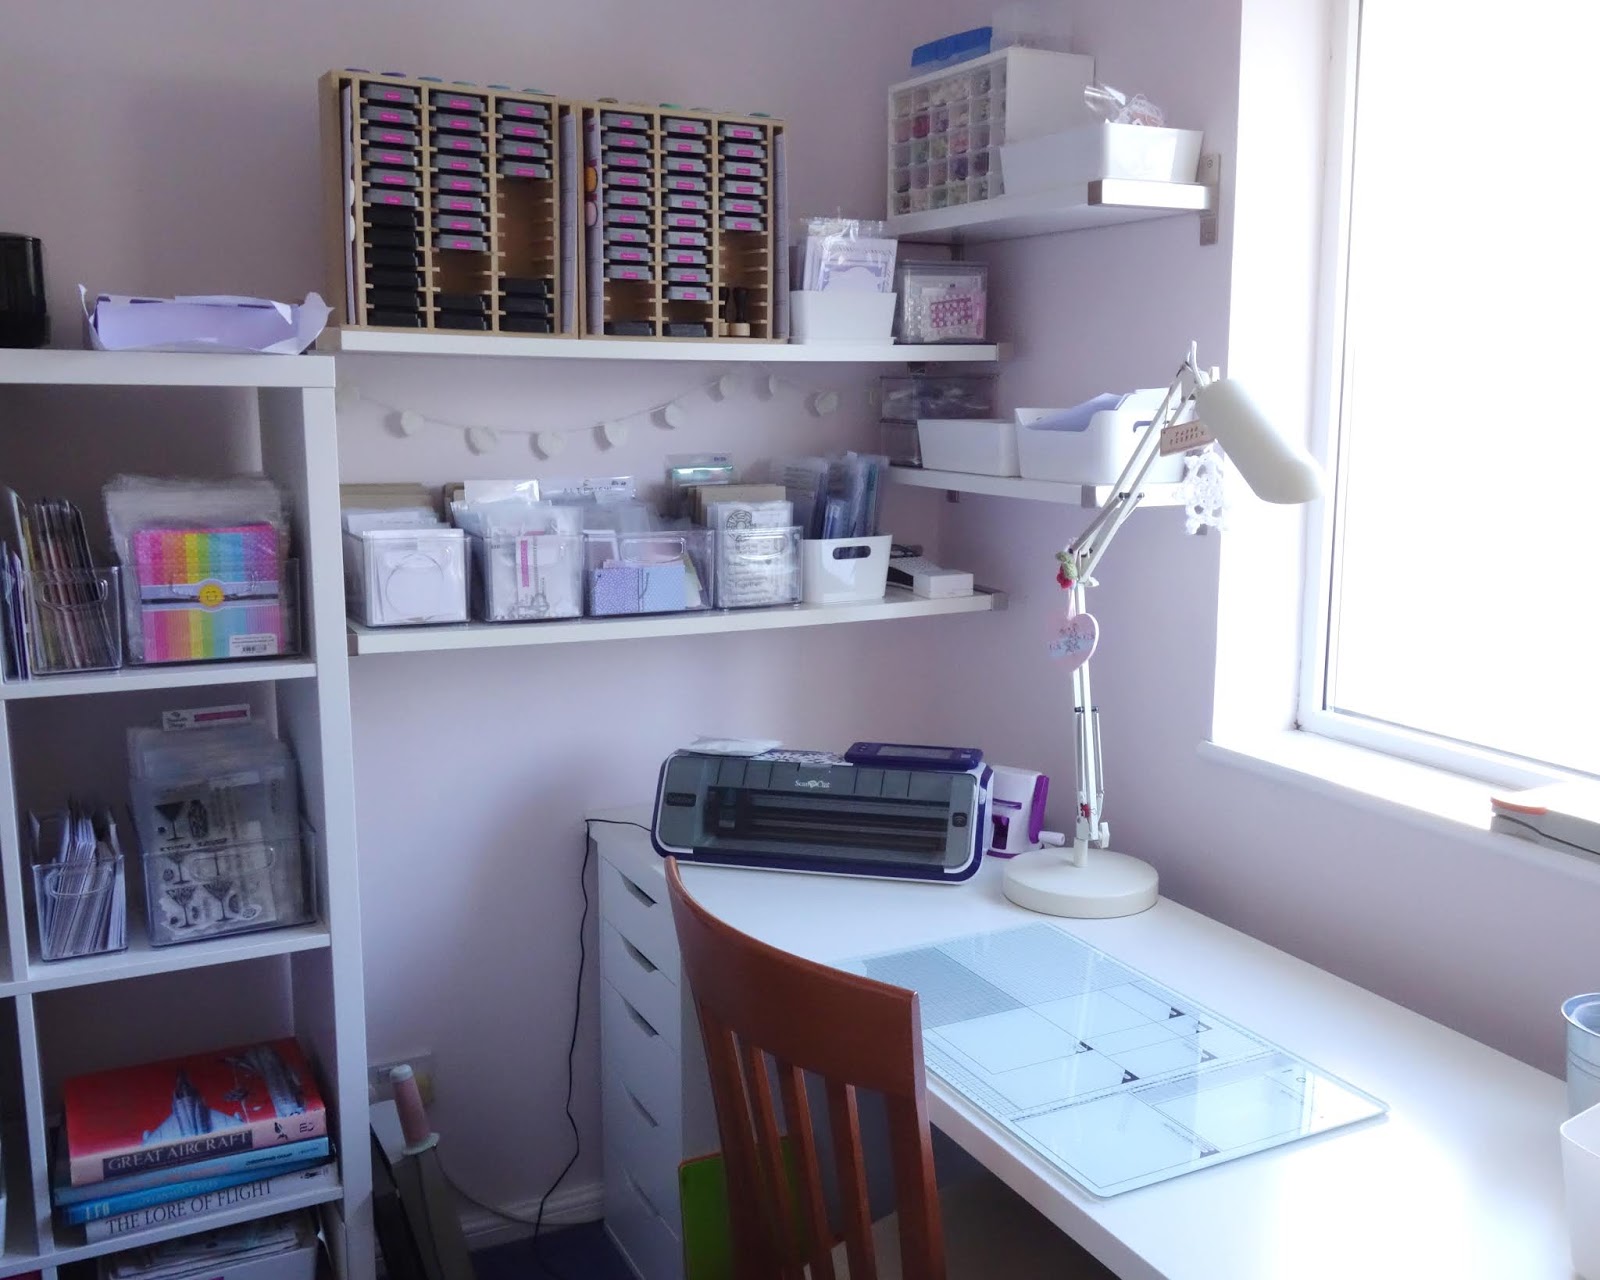
I know I LOVE to see other peoples crafting spaces so thought I'd share some before and after pics of it.

The room is an L shape and I had it set up with 2 desks; this is the smaller desk opposite the window where I had my laptop set up.

I'd cleared the shelves ready for moving things round!


This is one end of my long desk under the window, which is my crafting desk.


This is the other end of the desk and the door is just off to the right hand side of this photo.


So, it was a teeny bit annoying having to switch around between the 2 desks depending on what I was doing, and I would get glare from the window on my laptop, and I just felt it could be more efficient.

So, I decided to start by moving the desks together into one big L shape and now I can have the one chair and just swivel round to whichever desk I want to use!


I moved the cube unit over to the left and had space to pop my Raskog cart over there too so it's now easier to reach.


The other end of the desk stayed pretty much as it was, although I did move the Scan 'n' Cut over to this end.


I am amazed by how much bigger the room feels!

I'm sure I will want to move a few more things around as I test out the layout over the next few weeks but I absolutely love it :-)

Thanks for popping in and I hope you enjoyed seeing what I got up to this weekend!