Showing posts with label Authentique paper. Show all posts

Friday, 24 February 2017

Flowers for a friend

Hello lovely people,

It's a doubly exciting Friday today as I have next week off work and I am sharing a card that I am really really pleased with, using some gorgeous new stash :-)

This is my Dies to Die For DT card this week so as usual you can find all the product links at the end of my post.

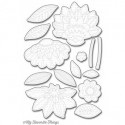
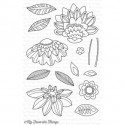
Kraft card for a friend using My Favorite Things Fancy flowers stamps and dies

These floral stamps and dies were a big hit with quite a few of the DtDF DT and I have to say I was smitten too!  I tried stamping them in different colour inks on different colours of card and colouring with different mediums, and all versions looked lovely!

I had to pick just one though for my first card and decided to go with white heat embossing on Kraft with Copic colouring.

Kraft card for a friend using My Favorite Things Fancy flowers stamps and dies

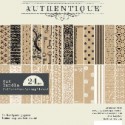
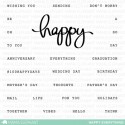
I was delighted when I found the perfect matching papers to use with the Kraft flowers and then even more so when I realised my new word dies would look lovely on here...it's fab when a card just comes together so nicely!

As you can see I got a little dimension in here too by layering some of the flowers on different heights of foam pads and stacking up 3 of each of the letters.

Kraft card for a friend using My Favorite Things Fancy flowers stamps and dies


If I've tempted you with any of the lovely supplies I've used then you can go straight to the individual products via the thumbnails at the end of my post or just pop over to Dies to Die For and have a little browse around!

Thanks for visiting and I really appreciate any comments that you leave,


Copic colours;
Pink: R81/83/85
Aqua: BG11/13/15

Lovely things I've used;
Friday, 17 February 2017

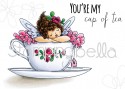
Edna takes a nap

Hello lovely people,

I intend to spend some quality time with Dr. Hubby on my day off today, so am just quickly popping in with my Dies to Die For DT card.

My last few DtDF cards have been pretty CAS but I felt that Edna deserved something a little fancier!

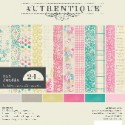
These papers are truly gorgeous; it's a real treat when you find a pad where you can see yourself using every single design :-)

That's actually why this card didn't end up properly fancy with flowers etc. because I couldn't bear to cover the gorgeous papers - lol!

Clean layered card with fairy in teacup (image from Stamping Bella)

I loved using my Inktense pencils for this card but am also quite excited to colour Edna with Copics too, just for comparison.

I planned for the teacup to be white, but wanted to keep it really vintage looking, so tried out a very pale shade of brown rather than grey and I think it really worked :-)

Clean layered card with fairy in teacup (image from Stamping Bella)

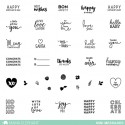
You wouldn't believe how long I faffed around trying to find the perfect sentiment for this card...and then I ended up using one of my most-used sentiment sets...ho hum, I am so predictable!

I also made some tiny fishtail banners because I wanted to make use of the even the tiny scraps of pretty papers and they added a cute detail since I wasn't using any other embellishments.

Clean layered card with fairy in teacup (image from Stamping Bella)

If I've tempted you with any of the lovely supplies I've used then you can go straight to the individual products via the thumbnails at the end of my post or just pop over to Dies to Die For and have a little browse around!

Thanks for visiting and I really appreciate any comments that you leave,


Inktense colours;
Skin: Baked earth, Madder brown, Saddle brown
Hair: Tan, Willow, Oak
Feather boa / flowers: Crimson
Leaves: Leaf green
Wings / tag: Mallard green
Teacup: Sepia ink
Ground: Ink black

Lovely things I've used;

Other card ingredients;
Filigree corner - La La Land

Sunday, 6 November 2016

Coffee boy

Hello lovely people,

I have had a short working week as I had Monday/Tuesday off to catch up on my crafty projects, and am now enjoying a relaxing weekend at my parents' house.
I attended a great workshop on Saturday with my Mum and my fab crafty friend Debs, and we had a wonderful time getting inky and covered in glitter!
We walked to a brilliant local firework display in the evening and have been indulging in lots of gorgeous home-cooked food courtesy of my Mum; the white chocolate cheesecake with raspberry puree was a real highlight :-)

While we are sat relaxing with a coffee I thought I'd share the card I made for my brother's birthday.  He loves coffee just like me so I had a great reason to use my fab Greeting Farm stamp set again.  Last time I used it the end result was rather more girly as you can see here.

Distressed masculine birthday card featuring boy with coffee cup (image is Mini Remix Brewtiful by The Greeting Farm)

I coloured this with my Inktense pencils and am delighted that I have now figured out how to add finer details like the shadows that the hair casts on the face and clothing folds.

Distressed masculine birthday card featuring boy with coffee cup (image is Mini Remix Brewtiful by The Greeting Farm)

Since I was doing a masculine card I raided my stash of corrugated card again...I love this stuff!  I am pleased to report that I managed to buy some corrugated card and whilst it's not quite as distressed as this lovely recycled packaging, the colour is perfect and I guess I can have fun distressing it myself!

Distressed masculine birthday card featuring boy with coffee cup (image is Mini Remix Brewtiful by The Greeting Farm)

I hope you are all having super weekends whatever you are getting up to.

Thanks for visiting and I really appreciate any comments that you leave,


Inktense colours;
Skin: Baked Earth, Madder Brown, Saddle Brown
Hair: Oak, Bark, Ink Black
Jumper: Deep Indigo
Trousers: Oak
Shoes: Ink Black
Coffee cup: Oak, Iron Green