Showing posts with label Inktense. Show all posts

Wednesday, 22 March 2017

Sweet birthday wishes

Hello lovely people,

I am still working my way through all my lovely new stash so today I am sharing a card I made for a very lovely lady using lots of my new things :-)

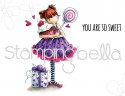
Girly birthday card using Tiny Townie Sammy is Sweet by Stamping Bella

 Since the recipient is such a master with Copics, I thought I'd send her an Inktense card - lol!  To be honest, it wasn't a conscious decision; I find the papers and image just seem to direct me one way or the other or maybe it's just whatever takes my fancy on any particular day!

Girly birthday card using Tiny Townie Sammy is Sweet by Stamping Bella

So, what's new on here?

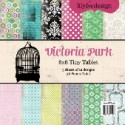
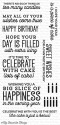
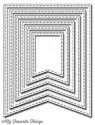
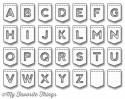
Well, the papers, the image, the stitched fishtail banners, the stitched banner alphabet and the sentiment...yep, that is actually EVERYTHING on this card!

I am loving all this new stuff but I especially love the cute banner alphabet and I can see it's going to be soooo useful :-)

Girly birthday card using Tiny Townie Sammy is Sweet by Stamping Bella


If I've tempted you with any of the lovely supplies I've used then you can go straight to the individual products via the thumbnails at the end of my post or just pop over to Dies to Die For and have a little browse around!

Thanks for visiting and I really appreciate any comments that you leave,


Inktense colours;
Skin: Baked earth, Madder brown, Saddle brown
Hair: Tan, Saddle brown, Sepia ink
Dress: Crimson, Shiraz
Cupcake: Crimson
Cherry: Shiraz, Red violet
Cupcake case / ground: Neutral grey
Aqua bits: Green aquamarine, Mallard green

Lovely things I've used from Dies to Die For;
Friday, 17 February 2017

Edna takes a nap

Hello lovely people,

I intend to spend some quality time with Dr. Hubby on my day off today, so am just quickly popping in with my Dies to Die For DT card.

My last few DtDF cards have been pretty CAS but I felt that Edna deserved something a little fancier!

These papers are truly gorgeous; it's a real treat when you find a pad where you can see yourself using every single design :-)

That's actually why this card didn't end up properly fancy with flowers etc. because I couldn't bear to cover the gorgeous papers - lol!

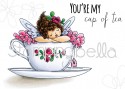
Clean layered card with fairy in teacup (image from Stamping Bella)

I loved using my Inktense pencils for this card but am also quite excited to colour Edna with Copics too, just for comparison.

I planned for the teacup to be white, but wanted to keep it really vintage looking, so tried out a very pale shade of brown rather than grey and I think it really worked :-)

Clean layered card with fairy in teacup (image from Stamping Bella)

You wouldn't believe how long I faffed around trying to find the perfect sentiment for this card...and then I ended up using one of my most-used sentiment sets...ho hum, I am so predictable!

I also made some tiny fishtail banners because I wanted to make use of the even the tiny scraps of pretty papers and they added a cute detail since I wasn't using any other embellishments.

Clean layered card with fairy in teacup (image from Stamping Bella)

If I've tempted you with any of the lovely supplies I've used then you can go straight to the individual products via the thumbnails at the end of my post or just pop over to Dies to Die For and have a little browse around!

Thanks for visiting and I really appreciate any comments that you leave,


Inktense colours;
Skin: Baked earth, Madder brown, Saddle brown
Hair: Tan, Willow, Oak
Feather boa / flowers: Crimson
Leaves: Leaf green
Wings / tag: Mallard green
Teacup: Sepia ink
Ground: Ink black

Lovely things I've used;

Other card ingredients;
Filigree corner - La La Land

Saturday, 31 December 2016

Peaceful snowy church

Hello lovely people,

I wasn't planning to share any more Christmas projects now the big day has been and gone, but I am going to make an exception for two more posts...and here is the first one.

I found myself gravitating towards very muted colours when choosing the papers for this card and really liked the end result, plus it's a little bit different.

It's also one of the very few projects that I made using my gorgeous new snowflake dies; I hope to use these much more next year!

Snowy church Christmas card (image from LOTV)


This beautiful church scene is from LOTV and this image makes me feel very peaceful...and it was very therapeutic to colour too with my Inktense pencils.

I added delicate lines of sparkle across the tops of the snow and trees and on all the snowfall dots, using a Quickie glue pen and loose white glitter, and the whole scene sparkles beautifully...IRL!

Snowy church Christmas card (image from LOTV)


I hope you all have a lovely last few hours of 2016; I think a lot of people are going to be glad to see the back of it!

Thanks for visiting and I really appreciate any comments that you leave,


Card recipe;
Image: Christmas scenes - Snowy church - LOTV
DP: A gift for you - Maja Designs
Dies: Stylish snowflakes - MFT Die-namics
Sentiment: computer generated

Inktense colours;
Church stonework: Indian ink
Windows: Sicilian yellow
Trees: Light olive
Snow: Iris blue
Path / tree trunks: Tan, Oak

Thursday, 1 December 2016

Special delivery

Hello lovely people,

Wow, it got cold!  Really really cold!  That's not a complaint though, and the thick frost was soooo beautiful when I went out for a little walk yesterday.  I think my heating stayed on all day though - lol!

And I stayed tucked up in my craft room :-)

It seems like I haven't done that much colouring lately, maybe because I am focusing on quicker makes for Christmas and maybe because I've had some new stash that has pushed me towards other techniques/styles such as die cutting and chipboard shapes.

Whatever the reason, I think I need to get back to more colouring so on that note I have a card with colouring to share today!

I made this a few weeks ago for a commission and I think baby girl cards might just be my fave type of cards to make...well, there's so much cuteness and pink you can add!

Shabby chic baby girl card (image from LOTV)

I just realised that this image is no longer available from LOTV (not even in digi format), which is very sad because it's such a gorgeous one.

Since I have this as a rubber stamp and was using such pale papers, I opted to colour it with Inktense pencils and was especially please with my first attempt to colour a cardboard box with them!

Shabby chic baby girl card (image from LOTV)

Once the colouring and basic layout was done it was on to my favourite bit of the creative process...flower arranging!  It's also probably one of the bits that takes me the longest because the flowers all have to be just right and I'm such a stickler for co-ordination!

Shabby chic baby girl card (image from LOTV)

I hope everyone's week is going well and if not, sending hugs your way.

Thanks for visiting and I really appreciate any comments that you leave,


Card recipe;
Image: discontinued (by LOTV)
DP: Vintage baby - Maja Design
Dies: Precious stars - Memory Box
Silver baby feet charm - The Ribbon Girl

Inktense colours;
Skin: Baked Earth, Carmine Pink, Madder Brown, Saddle Brown
Jumper / bear: Carmine Pink
Box: Tan, Saddle Brown, Oak
Label / ground: Indian Ink

Sunday, 6 November 2016

Coffee boy

Hello lovely people,

I have had a short working week as I had Monday/Tuesday off to catch up on my crafty projects, and am now enjoying a relaxing weekend at my parents' house.
I attended a great workshop on Saturday with my Mum and my fab crafty friend Debs, and we had a wonderful time getting inky and covered in glitter!
We walked to a brilliant local firework display in the evening and have been indulging in lots of gorgeous home-cooked food courtesy of my Mum; the white chocolate cheesecake with raspberry puree was a real highlight :-)

While we are sat relaxing with a coffee I thought I'd share the card I made for my brother's birthday.  He loves coffee just like me so I had a great reason to use my fab Greeting Farm stamp set again.  Last time I used it the end result was rather more girly as you can see here.

Distressed masculine birthday card featuring boy with coffee cup (image is Mini Remix Brewtiful by The Greeting Farm)

I coloured this with my Inktense pencils and am delighted that I have now figured out how to add finer details like the shadows that the hair casts on the face and clothing folds.

Distressed masculine birthday card featuring boy with coffee cup (image is Mini Remix Brewtiful by The Greeting Farm)

Since I was doing a masculine card I raided my stash of corrugated card again...I love this stuff!  I am pleased to report that I managed to buy some corrugated card and whilst it's not quite as distressed as this lovely recycled packaging, the colour is perfect and I guess I can have fun distressing it myself!

Distressed masculine birthday card featuring boy with coffee cup (image is Mini Remix Brewtiful by The Greeting Farm)

I hope you are all having super weekends whatever you are getting up to.

Thanks for visiting and I really appreciate any comments that you leave,


Inktense colours;
Skin: Baked Earth, Madder Brown, Saddle Brown
Hair: Oak, Bark, Ink Black
Jumper: Deep Indigo
Trousers: Oak
Shoes: Ink Black
Coffee cup: Oak, Iron Green

Thursday, 6 October 2016

My favourite flowers

Hello lovely people,

I'm still chasing my tail but did take some time out to go to the Great British Craft Festival with Debs and Sue on Sunday and oh boy, did we have a fantastic time!
Many pennies were spent and we all have lots of lovely new stash to play with :-)


Now it's time for a new challenge at As You Like It and we have the theme of...

YOUR FAVOURITE...DIE CUT OR BOUGHT FLOWERS
...and don't forget to tell us why it's your favourite!

Our sponsor this time is All Dressed Up with a prize of 2 digis of the winner's choice

I am a huge fan of any kind of flowers on my projects and although die cut flowers have lots of advantages, especially in the posting department, I think my 3D paper flowers will always be my favourites.
They are so pretty and I love to make little arrangements of them around my image to add dimension to my designs.

I used a new shaped base for this card, which was one of my brilliant bargains from the GBCF and it's perfectly shaped for a circular image...with flowers around it of course!

Shaped card in pastel pink and blue using Penelope has a pencil by Stamping Bella

I coloured the uber cute Penelope with my Inktense pencils in slightly brighter shades than I have used before.

Shaped card in pastel pink and blue using Penelope has a pencil by Stamping Bella


I hope you will pop over to As You Like It and check out the fabulously creative projects from the rest of the team :-)

I will be back tomorrow to show you something VERY exciting...some of you may already know what it is if you subscribe to a certain magazine ;-)

Thanks for visiting and I really appreciate any comments that you leave,


Inktense colours;
Skin: Baked Earth, Madder Brown, Saddle Brown
Hair: Tan, Willow, Oak
Dress / ribbon: Carmine Pink
Pencil body: Deep blue, Navy blue
Pencil tip: Tan, Willow
Pencil rubber: Baked Earth, Willow
Pencil metal band / desk: Charcoal Grey

Friday, 26 August 2016

Little mice

Hello lovely people,

I did warn you that I could well be back for a third day in a row and here I am!

I survived another day in work yesterday and now have another couple of weeks off before my full return.  I popped out at lunchtime to get my new glasses and am really pleased with them; well, they are purple!  Much as I love pink I'm not sure about it for my glasses - lol!  Dr. Hubby commented that they were very 'sexy schoolteacher!' so I think that's a compliment!

Enough of that though because today I have a card to share with you that I made with some gorgeous goodies from The Ribbon Girl.

We Ribbon Girls are allowed a little break in August, but I couldn't resist having a play with these beautiful new papers that are newly arrived at The Ribbon Girl; they have such a lovely vintage style and beautiful soft colour palette.

Romantic criss cross card with mouse couple

I was drawn to my Inktense pencils again for this image and was pretty happy with the result.  I am thinking I might do a little post dedicated to Inktense to share my insights so far into using them, such as they are!  Anyone fancy that?

Romantic criss cross card with mouse couple

I do love making criss cross cards, and that's another potential for a tutorial so I can show you the stand that I make for them and share my tips for attaching lace across the front.

I've made a large pull out tag; just a sweet and simple one with some little die cut hearts.

Romantic criss cross card with mouse couple

One more peek at the gorgeous flowers that I used and that scrummy lace, which I ended up covering quite a bit - oops!

Romantic criss cross card with mouse couple

I hope you all have a super bank holiday weekend :-)

Thanks for visiting and I really appreciate any comments that you leave,


The Ribbon Girl products;
Galleria Papieru - As if in a dream (retro) 12x12" papers
12mm Donna creamy ivory fine cotton lace
Heart charm with side loop
Ivory asters
Natural colour button twine
White cherry blossom

Other products;
Image: Hugs and kisses (Everyday in moonbeam meadow) - Crafter's Companion
Other flowers: from stash
Dies: Large frilly frames #10 - Go Kreate, Nesting hearts mini die - Xcut

Inktense colours;
Mice: 2100 Charcoal Grey & 0310 Mid Vermillion, 1530 Crimson for feet
Flowers / waistcoat / bow: 0530 Crimson
Leaves / grass: 1550 Spring Green, 1510 Beech Green
Mushroom top: 0310 Mid Vermillion, 1900 Willow, 1740 Saddle Brown
Mushroom stalk: as top plus 1730 Oak, 2010 Sepia Ink


Thursday, 21 April 2016

My favourite little bear

Hello lovely people,

It feels like a long time coming and has been a lot of work but I have finished my prescribing course :-)
I won't find out if I passed the practical exam and case presentation for a few weeks but for now I am just relieved that I made it to the end!

So now it's....

2 sleeps until coffee and cake date with my lovely friends Sue and Debs followed by beer festival

5 sleeps until holibobs

12 sleeps until my birthday

In the meantime we have a new challenge for you at As You Like It and our theme is...

YOUR FAVOURITE...ANIMAL
...and don't forget to tell us why it's your favourite!

Our sponsor this time is Crafty Ribbons with a £10 voucher


My favourite animal in a crafting sense is the one and only James bear because he is so utterly adorable and I always enjoy colouring his fur.

Pretty pastel card featuring James bear from LOTV


I thought I would see how he looked when coloured with Inktense pencils and it's certainly very different to colouring him with Copics but a lovely soft effect I think.

Pretty pastel card featuring James bear from LOTV

I kept the embellishments fairly simple so they wouldn't overshadow sweet James or cover up those lovely papers too much.

Pretty pastel card featuring James bear from LOTV

Card recipe;
DP: Flower frames (Rosa) - Pion Design (available from Live and Love Crafts)
Tag: Sentiment tags - LOTV
Dies: Tiny butterfly set - Impression Obsession, Lavish branch - Memory Box
Pearls - Kaisercraft - The Hobby House

Inktense colours;
Fur: 1740 Saddle borwn, 1730 Oak, 2010 Sepia ink
Flower: 600 Shiraz, 220 Sicilian yellow
Leaf / grass: 1560 Fern, 1540 Light olive

I hope you will pop over to As You Like It and check out the fabulously creative projects from the rest of the team :-)

Thanks for visiting and I really appreciate any comments that you leave,


Monday, 7 March 2016

Spring fairy

Hello lovely people,

LOTV are currently running a fab Spring themed challenge on their facebook page and you can find all the details here.
There are some absolutely brilliant prizes on offer so do take a peek.
Here's my Design Collective card that I hope will inspire you to join in with the challenge.

Handmade card with Spring fairy (image from LOTV)


If you think the image is looking a little different to my usual it's because I've used my new Inktense pencils!
I still need a lot of practice but feel I have got the basic method of shading and I do really like the softer look than I can get with my Copics.

Handmade card with Spring fairy (image from LOTV)

I used a new die to create the little swirls and beaded sprays tucked among the flowers.
I don't think I would ever use this die all in one piece but it looks really lovely cut into smaller pieces.

Handmade card with Spring fairy (image from LOTV)


Card recipe;
Image: Petal - LOTV
DP: Vintage Spring - Maja Design (available from Live and Love Crafts)
Tag: Sentiment tags - LOTV
Dies: Large frames frilly #7 - Go Kreate, Tilda lace - Magnolia Doohickeys, Beaded swirl flourish - Sue Wilson for Creative Expressions

Inktense colours;
Skin: 0520/1800/1740
Hair: 1730/1740/2010
Dress / leaves: 1320
Wings: 0520
Flower: 0220/0240
Tights: 1720
Shoes: 2010

Thanks for visiting and I really appreciate any comments that you leave,