
Showing posts with label home decor. Show all posts

Wednesday, 11 January 2017

Same but different!

Hello lovely people,

I've had a really fun and productive day off today and thought I'd wrap it up with a quick blog post to share another decorated embroidery hoop.

It is VERY similar to my previous one of these in lilac...can you spot the tiny differences, other than the colour of course?!

Blue sewing themed vintage style embroidery hoop

For this one I added a few buttons and I only used one pin this time but it's a real beauty isn't it?

Blue sewing themed vintage style embroidery hoop

I changed the charm too :-)

Yep, that's about it - lol!
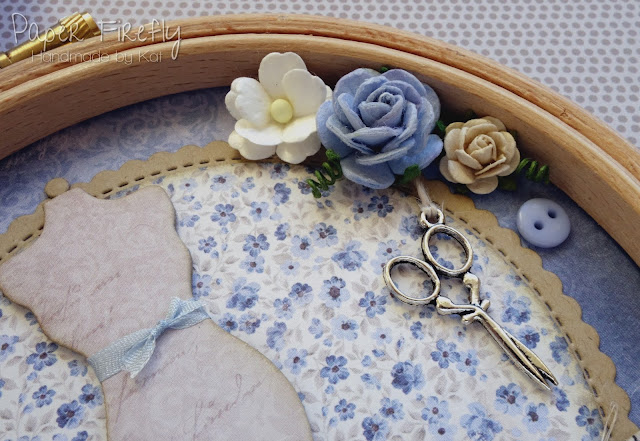
Blue sewing themed vintage style embroidery hoop

I hope you are all having a good week, but probably looking forward to the weekend?!

Thanks for visiting and I really appreciate any comments that you leave,

Monday, 2 January 2017

Baby's first Christmas keepsake hoops

Hello lovely people,

Happy New Year!
I hope 2017 is full of wonderful things for you all :-)

This will be my last post with Christmas creations but there was no way I could resist sharing this pair of 4" embroidery hoops that I made for two little ones' first Christmas.

Baby's first Christmas keepsake embroidery hoop with teddy bear (image from LOTV)

They are both for little girls but I didn't want to make both of them pink so one is in pretty aqua instead.

Baby's first Christmas keepsake embroidery hoop with teddy bear (image from LOTV)

As soon as I got the commission for these I knew I wanted to use James bear images and now he is available in digi format, I could make them just the right size for the hoops.

As usual I have made the sentiments on my computer and then I finished off just with a few snowflakes, in die cut and metal charm form.

Baby's first Christmas keepsake embroidery hoop with teddy bear (image from LOTV)

I made sure the back of the hoops also looked pretty and added a little tag to so that a message could be added but kept hidden.

Baby's first Christmas keepsake embroidery hoop with teddy bear (image from LOTV)

I hope you have all had a good bank holiday...I have loved the extra crafting time!

Thanks for visiting and I really appreciate any comments that you leave,


Card recipe;
DP: Pink ones by Maja Design and Aqua ones by Galleria Papieru

Copic colours;
Fur: E40/41/42/43
Everything else: lost in the Christmas chaos!

Wednesday, 21 December 2016

Let it snow hoop

Hello lovely people,

I had a busy morning of shopping and baking then took some time out to relax with my fabulous buddies Sue and Debs this afternoon; just chatting, drinking tea/coffee and eating scrummy soup and cake :-)

Now I'm just off to watch an old episode of Sherlock (catching up before the new season in January - excited!) with Dr. Hubby but thought I'd quickly share another Christmas project first.

This is another 3" decorated wooden embroidery hoop.

Snowflake decorated embroidery hoop

The sparkler on the snowflake is just gorgeous and I added a little more sparkle with some silver twine to hang it up.

The sentiment is computer generated.

Snowflake decorated embroidery hoop


Well, that's it from me..short and sweet!

Thanks for visiting and I really appreciate any comments that you leave,


Card recipe;
DP: Snow Queen - Galleria Papieru
Dies: Large snowflake - Noor! Design
Silver metallic twine - The Ribbon Girl
Sparkler gem: from stash

Wednesday, 7 December 2016

Be merry embroidery hoop

Hello lovely people,

I love a good craft room day...and today has definitely been one of those!  There's still plenty more time to keep on crafting as Dr. Hubby is away so I can craft as long as I like ;-)

I thought I'd take a little break from colouring to show you something a bit different; it's a 3" embroidery hoop that I have made into a Christmas decoration.

I glued DP to card so it was nice and sturdy then covered the front and the back of the hoop.

Embroidery hoop Christmas decoration with poinsettia in traditional colours

I used my beautiful poinsettia die and various snipped up die cuts to add decoration and finished it with a computer-generated sentiment and pearls.

The back is covered with DP but otherwise left plain.

Embroidery hoop Christmas decoration with poinsettia in traditional colours


I really loved making this and was delighted with how it turned out so do let me know what you think of it :-)

Thanks for visiting and I really appreciate any comments that you leave,


Card recipe;
DP: A gift for you - Maja Design
Dies: Circle STAX - MFT Die-namics, Stitched poinsettia trio - Poppystamps, Tall Chloe stem - Memory Box, Fancy flourish - MFT Die-namics


Thursday, 15 September 2016

Vintage floral heart

Hello lovely people,

This past week I have not got a huge amount done, mainly because I have been glued to the Paralympics any chance I get; what amazing athletes and so many fantastically exciting events to watch.  Team GB also seem to be doing pretty well ;-)


I did drag myself away though to tell you about the new challenge at In The Pink and this time we have a photo inspiration for you...


There's loads to inspire you here from the gorgeous vintage style to all the pretty embellishments but don't forget we want to see more pink than any other colour!

Our fabulous sponsor this time is Live and Love Crafts with a £10 voucher

I finally got around to decorating another MDF heart and it's just a dinky one at approximately 8cm square.  I painted just around the edges with white acrylic paint, then covered both the front and back with DP, sanded the edges and sponged a little ink round it.

I did the sentiment on my computer, using a well known quote and mixing up 2 fonts for what I hoped was a stylish look!

Vintage floral decorated MDF heart

I cut all the flowers on my Cricut, so I could make lots of different sizes for variety, and of course, I had to add some pretty pearls and lace :-)

Vintage floral decorated MDF heart


If you haven't already done so then do pop over to In The Pink and check out the gorgeous creations from the rest of the Pink Ladies.

I hope your week is going well and you know the weekend is not far away now!

Thanks for visiting and I really appreciate any comments that you leave,


Card recipe;
DP: Scraps from various Maja Design collections (available from Live and Love Crafts)
Flowers: Cut with Cricut (Create a Critter cartridge)
Twine: Ivory button twine - The Ribbon Girl
Lace: 8mm 'Rebecca' ivory vintage style fine scallop lace - The Ribbon Girl

Wednesday, 16 December 2015

Merry and bright

Hello lovely people,

I'm going to have to start with another one of 'those' apologies for not visiting my lovely blogging friends over the past week.
I have been concentrating on another big piece of coursework, our internet at home seems to be on snail's pace, I still have loads of Christmas cards to make and I haven't even had time to put my decorations up yet :-(

However, I did at least manage to create something for the new challenge at Creative Inspirations and this week we have the theme...

MERRY CHRISTMAS!

Our sponsor this week is none other than our lovely Creative Inspirations boss, Natalie, with a  fabulous mystery prize!

Last week I showed you a gift bag I had made and teased you with talk of the matching gift to go in it!
So here it is...a decorated MDF bauble.

Shabby chic bauble decoration

I chose just white flowers for the decoration and tried out some new beaded stamens with them.  They come in little bunches but I pulled one apart and popped individual stamens in where I wanted them.

I chose just white flowers for the decoration and tried out some new beaded stamens with them; I pulled the arrangement apart and popped them in separately though!

I love the mix of fonts on this sentiment and think it suits the shabby chic style of the decoration perfectly.

Shabby chic bauble decoration

Bauble recipe;
DP: Home for the holidays - Maja Design (available from Live and Love Crafts)
Flowers: Wild Orchid Crafts
Twine: from stash
Sentiment: Pink Petticoat

The DT have made some wonderful samples to inspire you so pop over to Creative Inspirations to take a look :-)

Thanks for visiting and I really appreciate any comments that you leave,


Thursday, 12 November 2015

Pink bauble

Hello lovely people,

For those of you keeping up with my exploits as part of my prescribing course I spent most of yesterday learning to take a full medical history from patients and practised my 'skills' on 3 poor unsuspecting victims patients!
Today I shall be writing up my notes from that and also an essay on consent and confidentiality...oh what fun!

Speaking of fun, and not in an ironic way, it's time for a new challenge at In The Pink and our theme for this one is...

FANCY FOLD / SHAPE

So, that's any kind of folded design, a card with folding detail or any shaped design that's not a square or rectangle...with more pink than any other colour of course!

We are sponsored this time by The Hobby House with a £10 voucher

I picked up some MDF baubles at the NEC Hobbycrafts show and couldn't wait to have a play so here's my slightly shabby chic  bauble decoration...

MDF bauble decorated in pink with snowflakes


I used my favourite little snowflake dies and added some gems...the sparkler on the biggest snowflake also came from the NEC and I LOVE...good job I bought a few ;-)

MDF bauble decorated in pink with snowflakes


Project recipe;
DP: Vintage frost basics - Maja Design (available from Live and Love Crafts)
Ribbon: from stash
Twine: Natural button twine - The Ribbon Girl
Bell: Jingle bells silver 10mm - The Ribbon Girl
Dies: Circle stax and Dainty dot - MFT Die-namics, Small snowflake die set - Impression Obsession
Sentiment: Pink Petticoat
Gems: from stash
If you haven't already done so then do pop over to In The Pink and check out the gorgeous creations from the rest of the Pink Ladies.

Thanks for visiting and I really appreciate any comments that you leave,


Challenges I am entering;
to be added

Thursday, 20 August 2015

Live, laugh, love

Hello lovely people,

It's time for a new challenge at In The Pink and our theme this time is...

FLY AWAY
(With an option of using pink & 1 other colour)

Our fabulous sponsor this time is Bunny Zoe's Crafts with a £10 voucher


I keep saying I would like to do more home decor projects so decided to decorate a wooden heart.
I cut the DP to fit the heart, inked the edges and then stamped a few swirls around the edge.
Once the DP was glued firmly in place I sanded back the edges to give a slightly distressed finish.


These butterfly dies are absolutely gorgeous and I really haven't used them much but knew they would be perfect for this project...and for the challenge theme of course!


The words are stamped from individual letter stamps, cut into strips, and have one foam pad under the middle to add that little bit of dimension.
The charm was a last minute addition and I'm so glad I popped it on as it looks so pretty :)


Project recipe;
Wooden heart: from Hobbycrafts show
DP: Summer Crush - Maja Design (available from Live and Love Crafts)
Swirl stamp: Summer swirl - Magnolia
Dies: Leavenworth butterfly trio - Memory Box
Charm: Daisy chain - The Hobby House
Twine: Ivory button twine - The Ribbon Girl
Ribbon: from stash
Lettering: magazine freebie stamp set


If you haven't already done so then do pop over to In The Pink and check out the beautiful creations from the rest of the Pink Ladies.

Thanks for visiting and I really appreciate any comments that you leave,


Challenges I am entering;
Papertake Weekly (to die for)
Inky Chicks (hearts)
Fab 'n' Funky (things with wings)
The Ribbon Girl (pink)
ABC challenge (pretty in pink)

Thursday, 14 May 2015

I {heart} sewing

Hello lovely people,

Hmmm, I wish the weather would make up it's mind; one minute I'm in shorts and the next I'm popping the heating back on!
At least all the pretty flowers in the garden are doing well and my tomatoes are rocketing away :-)

But you didn't drop by for a weather report and it's time for a new challenge at In The Pink where our theme this time is...

STITCHING

This can be real or faux, it's up to you!

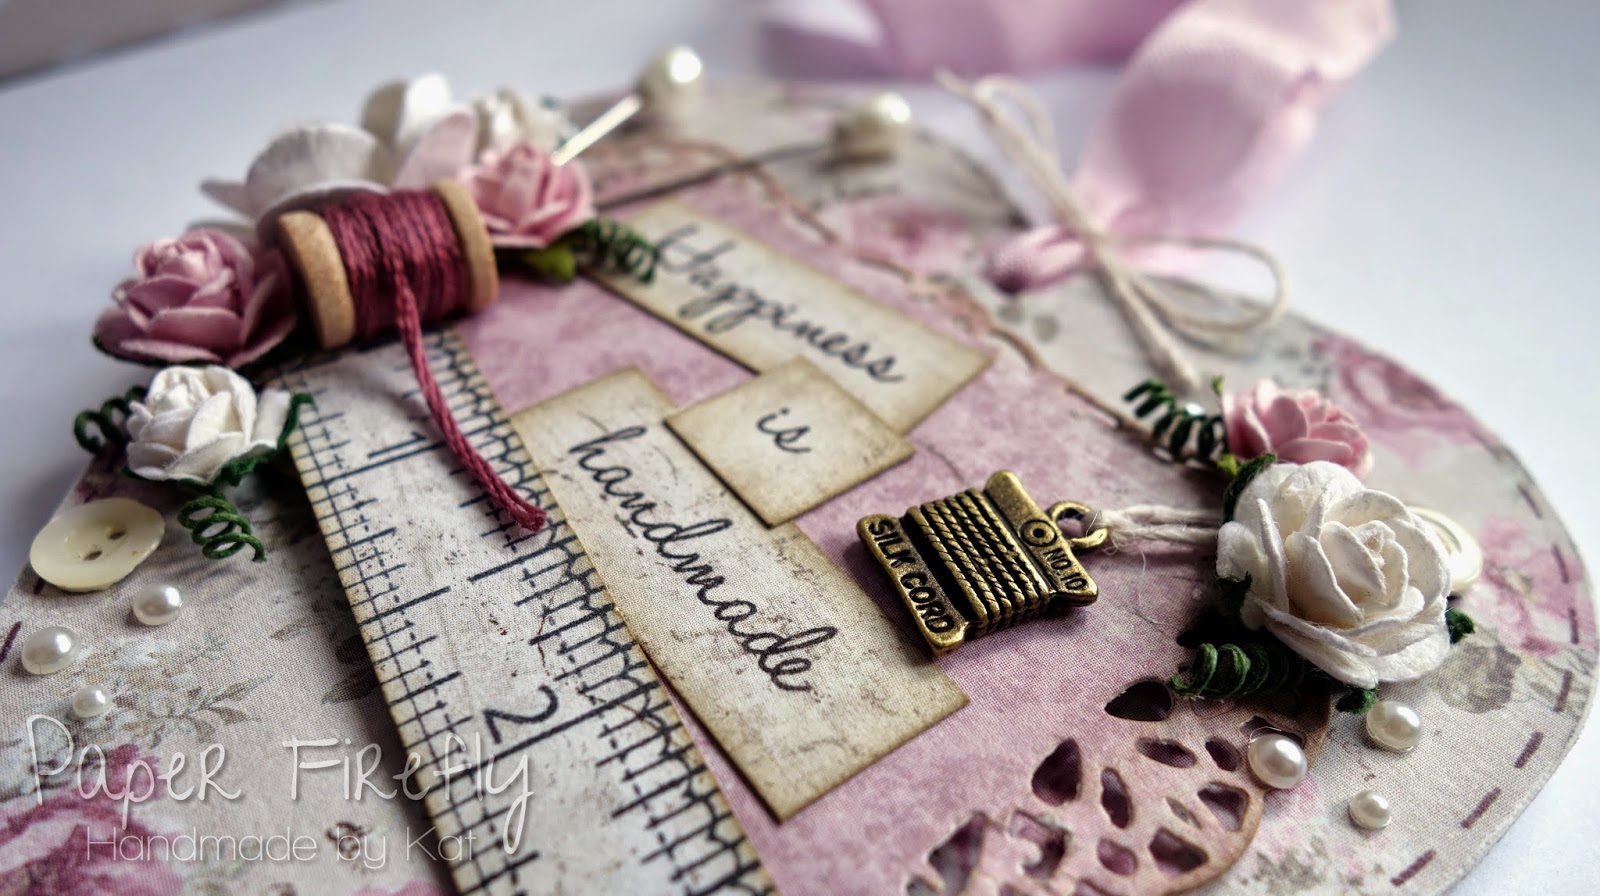
I love to stitch on my cards but thought I'd use the theme in a slightly different way and have a play with an MDF heart to create a sewing themed decoration.


You can't see in the photo but I painted the back and sides of the heart with white acrylic paint and covered the front with pretty paper, which I sanded slightly around the edge.

Then it was the fun part of adding all the little details...the heart is only 8cm across so I managed to get quite a few on there!


I was excited to use one of the teeny wooden bobbins I picked up at the Hobbycrafts show especially when I found just the right shade of thread to wind onto it!


The quote was typed on the computer and printed onto scraps of DP.

Given my love of stitching on my cards it is rather ironic that the stitching isn't real this time but I didn't want anything to stop the DP sticking really nice and flat to the heart.


Heart recipe;
DP: Vintage Summer basics - Maja Design (available from Live and Love Crafts)
Seam binding: Pink tulip - The Ribbon Girl
Dies: Timeless rectangles - Spellbinders
Tape measure: freebie stamp with magazine
Pins: Teardrop ivory pearlised pins - The Ribbon Girl
Charm: Silk cord spool - Live and Love Crafts
Buttons / pearls: from stash

I had so much fun decorating this heart and can't wait to do another one!
Maybe a baby or wedding one?

If you haven't already done so then do pop over to In The Pink and check out the gorgeous creations from the rest of the Pink Ladies.
We are also welcoming the lovely and very talented Sue to our DT; you may remember her from her gorgeous guest designer cards and we are delighted to have her on board permanently :-)

Thanks for visiting and I really appreciate any comments that you leave,