Sunday, 17 July 2016

Wee Cindy

Hello lovely people,

Today I will be in the Cotswold Water Park supporting my Dad as he undertakes his first Ironman distance triathlon...yep, my Dad is totally amazeballs :-)

While I am cheering on my Dad, I have my first official card as part of The Ribbon Girl DT to share with you for the new 'Any Image' challenge starting today.
I'm still grinning from ear to ear at being asked to join the team :-D

Here are the fabulous prizes on offer...

£10 voucher for LOTV

£10 voucher for The Ribbon Girl

Stamp and die from Marianne Designs

I have used some of my new Lemoncraft papers and let me tell you, they were almost left in the 'stroke only' pile because they are absolutely gorgeous!

Some are slightly more aqua-teal shades and some are a slightly lighter aqua-turquoise, which are the ones I chose for this card.

Girly fairy card in shades of aqua (image from Wee stamps)


My tiny collection of Wee stamps is now doubled with the addition of this cutie and I know it won't stop there as I totally love them!

I feel slightly bad that I didn't give her sparkly wings but I liked how the spotty wings turned out and didn't want to risk covering it up with sparkle!  I guess I was being selfish - lol!

Girly fairy card in shades of aqua (image from Wee stamps)

I really went to town with the pretty embellies for this card and I also used my new sentiment stamps and matching tags...LOVE these!

On top of the bow I added just one little section from the pearl trim; thanks to Debs for the tip about cutting the trim to make cute details!

Girly fairy card in shades of aqua (image from Wee stamps)

I hope you are all having a lovely weekend whatever you are up to :-)

Thanks for visiting and I really appreciate any comments that you leave,


The Ribbon Girl products;
Forget-me-not 6x6" paper pad - Lemoncraft
25mm white 'Cheltenham' Guipure lace
Limoges blue seam binding
White cherry blossom
Cream hip rosebuds
Tiny white rosebuds
10mm white square pearl trim
Small butterfly charm
5mm sea charm mixed pearls
3mm white pearls

Other products;
Image: Cindy - Wee stamps for Whimsy stamps
Dies: Fancy flourish - MFT Die-namics, Mini tags - Mama Elephant
Sentiment: Mini messages - Mama Elephant
Gloss white Nuvo crystal drops
Other flowers: from stash
2mm white pearls: from stash

Copic colours;
Skin: E000/00/21/11/04 & R20
Hair: E21/25/29
Dress: B000/00/01/BG53
Darker bands on dress: BG09/57/53/B01
Wings: B0000/000/00/01/BG53
Flowers: B000/01/BG53
Envelope: W00/1/3

Thursday, 14 July 2016

My 'trademark' - can you guess?!

Hello lovely people,

It's half way through the week and so far I have completed a few tasks;
- I decluttered our en-suite cupboard and organised the remaining items into some new plastic bins; I LOVE to have new storage for things!
- I ordered a new side table for the lounge
- I updated my Folksy shop with some new cards

Other than that I may have got a little sidetracked by crafting - lol!

While I try to get a few more jobs done today, it's time for a new challenge for you at As You Like It and our theme is...

YOUR 'TRADEMARK' STYLE...
...i.e. what defines your style 
...and don't forget to tell us why!

Our sponsor this time is Digi Stamp Boutique with a £10 voucher

My trademark has to be stitching since it is on almost all of my cards, no matter what style.  I love the subtle detail it adds and the way it 'finishes' the edges.
I also find it very therapeutic as I do all of it by hand!

The card is for someone leaving to have a baby and since they don't know if it's a boy or girl I went for neutral colours.

Handmade card for someone leaving to have a baby, with neutral colours


I was excited to play with my new co-ordinating stamps and dies for this card and I wasn't sure if paying extra for the dies would be worth it but it totally is!

I wouldn't usually go to the bother of fussy cutting the elements, but the dies make it so easy, which means I can create a design like this one where I have raised up the babygros slightly on foam pads.

I am continuing my current love affair with Frantage, but I do like to be quite sparing with it to add just a hint of detail.

Handmade card for someone leaving to have a baby, with neutral colours

I hope you will pop over to As You Like It and check out the fabulously creative projects from the rest of the team :-)

Thanks for visiting and I really appreciate any comments that you leave,


Card recipe;
Image & sentiment: Little bundle stamps and co-ordinating dies - Lawn Fawn (from Dies to Die For)
DP: Vintage baby - Maja Design (available from Live and Love Crafts)
Dies: Scallop circles - Tonic Studios, Circle stax - MFT Die-namics
Charm - Baby time charms and spacers - The Hobby House
Frantage shabby white embossing enamel

Monday, 11 July 2016

Peace on Earth

Hello lovely people,

I have just 9 weeks left of my career break and now my course and the USA trip are all done and dusted, I am suddenly feeling an urgency to tick off a few more goals for the year.

So, this week my plans include;
 - making serious inroads towards completing the Kit and Clowder skin/hair colouring class
- buying a few new kitchen items that we need; kettle, saucepans, hand blender
- start seriously decluttering the house

I have made a start today by sorting through all the accumulated stuff in the area behind the sofa in the cinema room and got rid of loads :-)

I did find time to play with some of the new release Christmas images from LOTV though.  I say 'new' but actually the image I have used today is one of our returning friends.

Christmas angel in traditional red and green (image from LOTV)

I never had this cutie the first time round (I'm shocked too!) but couldn't resist her second time around :-)

I was planning to colour her dress in white because...well, it's easiest!  At the last minute I decided to make life a little harder for myself and go for red instead because I thought it would match the papers better *sigh*

Christmas angel in traditional red and green (image from LOTV)

I often like non-traditional colours for Christmas cards but this Maja Design collection is so beautiful and it does suit the angel rather well I think.

Christmas angel in traditional red and green (image from LOTV)


The release date for all the images is...TOMORROW!!
As usual, I would get in quick if you don't want to miss out...there are some super cute new stamps and more fab returning friends :-)

Thanks for visiting and I really appreciate any comments that you leave,


Card recipe;
Image: Christmas angel flying - LOTV (coming back soon!)
DP: A Gift for you - Maja Design (available from Live and Love Crafts)
Dies: Fanciful trim - Creative Expressions
Charm: Holly leaves tiny - The Ribbon Girl

Copic colours;
Skin: E000/00/21/11/04 & R20
Hair: E41/43/47
Dress: R27/46/89
Wings: W00/1/3
Holly: BG93/96 & R59/89

Saturday, 9 July 2016

Vintage Summer alliums

Hello lovely people,

Are you all having a good weekend?  I do hope so :-)

I have been having a little play in my craft room and despite the cloudy weather I have been bringing a little Summer to my crafting today.

I have made a LOTV card to support the challenge currently running on the LOTV Facebook page with the theme of SUMMER IN THE GARDEN.

I was sorting through all my paper pads a couple of days ago and removing the ones I am never going to use, but it also reminded me of a few oldies but goodies lurking in there...like these pretty Kaisercraft ones.

Pink allium card (image from LOTV)


Colouring this image is very simple but you can still add plenty of detail and I added some very pale green dots around the flower heads and some white Nuvo drops around the whole image.

Pink allium card (image from LOTV)

I made this feel quite vintage with inked edges, Kraft card and twine, and I layered up 3 of the word die cuts to make it stand out a bit more.

Pink allium card (image from LOTV)


I'm now off for a cheeky afternoon tea as I have a couple of homemade scones that need eating up with some jam and clotted cream...yum :-)

Then Dr. Hubby and I are going to snuggle up and watch the latest Star Wars film in our cinema room...we haven't seen it yet so am rather excited about that!

Thanks for visiting and I really appreciate any comments that you leave,


Card recipe;
DP: Tigerlily - Kaisercraft
Tag: Sentiment tags - LOTV
Dies: Thanks word - Paper Smooches, Tiny butterfly set - Impression Obsession
Pearls: from stash

Copic colours;
Flowers: R81/83/85
Leaves / stems / around flowers: BG90/93

Thursday, 7 July 2016

Tilda in the garden

Hello lovely people,

Dr. Hubby and I took a little trip to Bath yesterday for my Independent Prescriber graduation ceremony followed by a celebratory meal out.

Here I am receiving my certificate from the course director and yes, it was actually a lovely sunny Summer day so I wore a dress!


Today I am having a crafty play date with my lovely buddies Sue and Debs...yes, again!

While we get stuck into some crafting and chatting, and a cheeky cream tea (yum yum!), it's time for a new challenge at In The Pink


Our theme this time is...

ALL OR NOTHING!
So that's FUSSY AND FANCY
OR
CLEAN AND SIMPLE...your choice!
But don't forget we want to see more pink than any other colour!

Our fabulous sponsor this time is Little Miss Muffet with a $6 voucher


I love both FAF and CAS but I guess I probably lean a bit more towards FAF and I fancied trying my hand at a swing easel for this design.  I really like it...but I am always finding new fancy folds that I like!

Swing easel card with Tilda in the garden

I can't even remember the last time I used a Tilda so it was fab to get this one out and give her the pink treatment!

I can only dream of looking this stylish when I'm working in the garden!

Swing easel card with Tilda in the garden

Hopefully you can see the swing easel design a little better in this angled shot.

As with any easel design you can't really add too much on the bottom layer but I found plenty of space on the top to add flowers!

Swing easel card with Tilda in the garden


If you haven't already done so then do pop over to In The Pink and check out the gorgeous creations from the rest of the Pink Ladies...can you guess who will go FAF and who will go CAS?!

Thanks for visiting and I really appreciate any comments that you leave,


Card recipe;
Image: Tilda in the garden
DP: Romance & roses, and Pastel dreams (available as digi papers from Nitwit Collections)
Dies: Lovely fence - Magnolia Dohickeys, Beaded swirl flourish - Creative Expressions
Punch: Floral lace - Martha Stewart edge punch
Charm: Butterfly (small) charm - The Ribbon Girl

Copic colours;
Skin: E000/00/21/11/04 & R20
Hair: Y21/YR23/E35
Clothing: R81/83/85 & W00/1/3
Boots: W4/5/6/7
Spade: W00/0/1 & E53/55/57
Grass: YG03/25/17

Wednesday, 6 July 2016

Beach huts

Hello lovely people,

I didn't manage to come back and share any cards after posting the pics of my new stash...I did play with some of it but then realised that I can't show you the projects yet - oops!

It's Creative Inspirations challenge time and this week we have the theme...

SEASIDE / SUNSHINE / SUMMER HOLIDAYS

Our sponsor for this challenge is Craftie Charlie with an amazing £20 voucher


I was surprised by the lack of Summery stamps in my collection but I stumbled upon this previously unused stamp with some cute beach huts and some suitably seaside-y papers.

Handmade card with row of beach huts

I wanted to include a knot on my design so did a little Google search and came up with this...for anyone interested it's called a carrick bend...I just thought it looked nice!

Handmade card with row of beach huts


The DT have made some wonderful samples to inspire you so pop over to Creative Inspirations to take a look :-)

Thanks for visiting and I really appreciate any comments that you leave,


Card recipe;
Image: Dinkies beach huts - Little Claire (also available as digi)
DP: Shoreline treasures - Pion Design (available from Live and Love Crafts)
Twine: from stash
Tag: Sentiment tags - LOTV
Dies: Stitched scalloped edges - MFT Die-namics

Copic colours;
Blue: B91/93/95
Red: R24/29/46/59
Pale grey: W00/0/1
Roofs / ground: W2/3/4

Sunday, 3 July 2016

To Die For!

Hello lovely people,

I have no card to share today...at least not yet!

I was invited by my lovely friend Sue to go with her to the Dies To Die For pop-up shop yesterday so we had a little road trip and oh boy, was it totally worth it!

I got this gorgeous canvas bag and proceeded to fill it full of goodies!


First there were some lovely stamps, and yes, that's a co-ordinating die set for the baby stamps.  The dies for the elephants were out of stock so I guess I can get those later...any excuse for another shopping spree!


Then some sentiments because you can never have too many, and these all add another different style to my sentiment collection.


Then just a couple of dies...well, it would have been rude not to, and those little tags co-ordinate with the Mama Elephant sentiments above.


Then a couple of paper pads, including a very old MME pad that is an absolute fave of mine and I've never been able to get my hands on another one so I was rather delighted with that!

And yes, that's the brand new Maja Design collection, because I am somewhat obsessed!


Then just one or two Maja Design papers to top up my stash...


And here's what 87 sheets of Maja Design paper looks like from the side - lol!


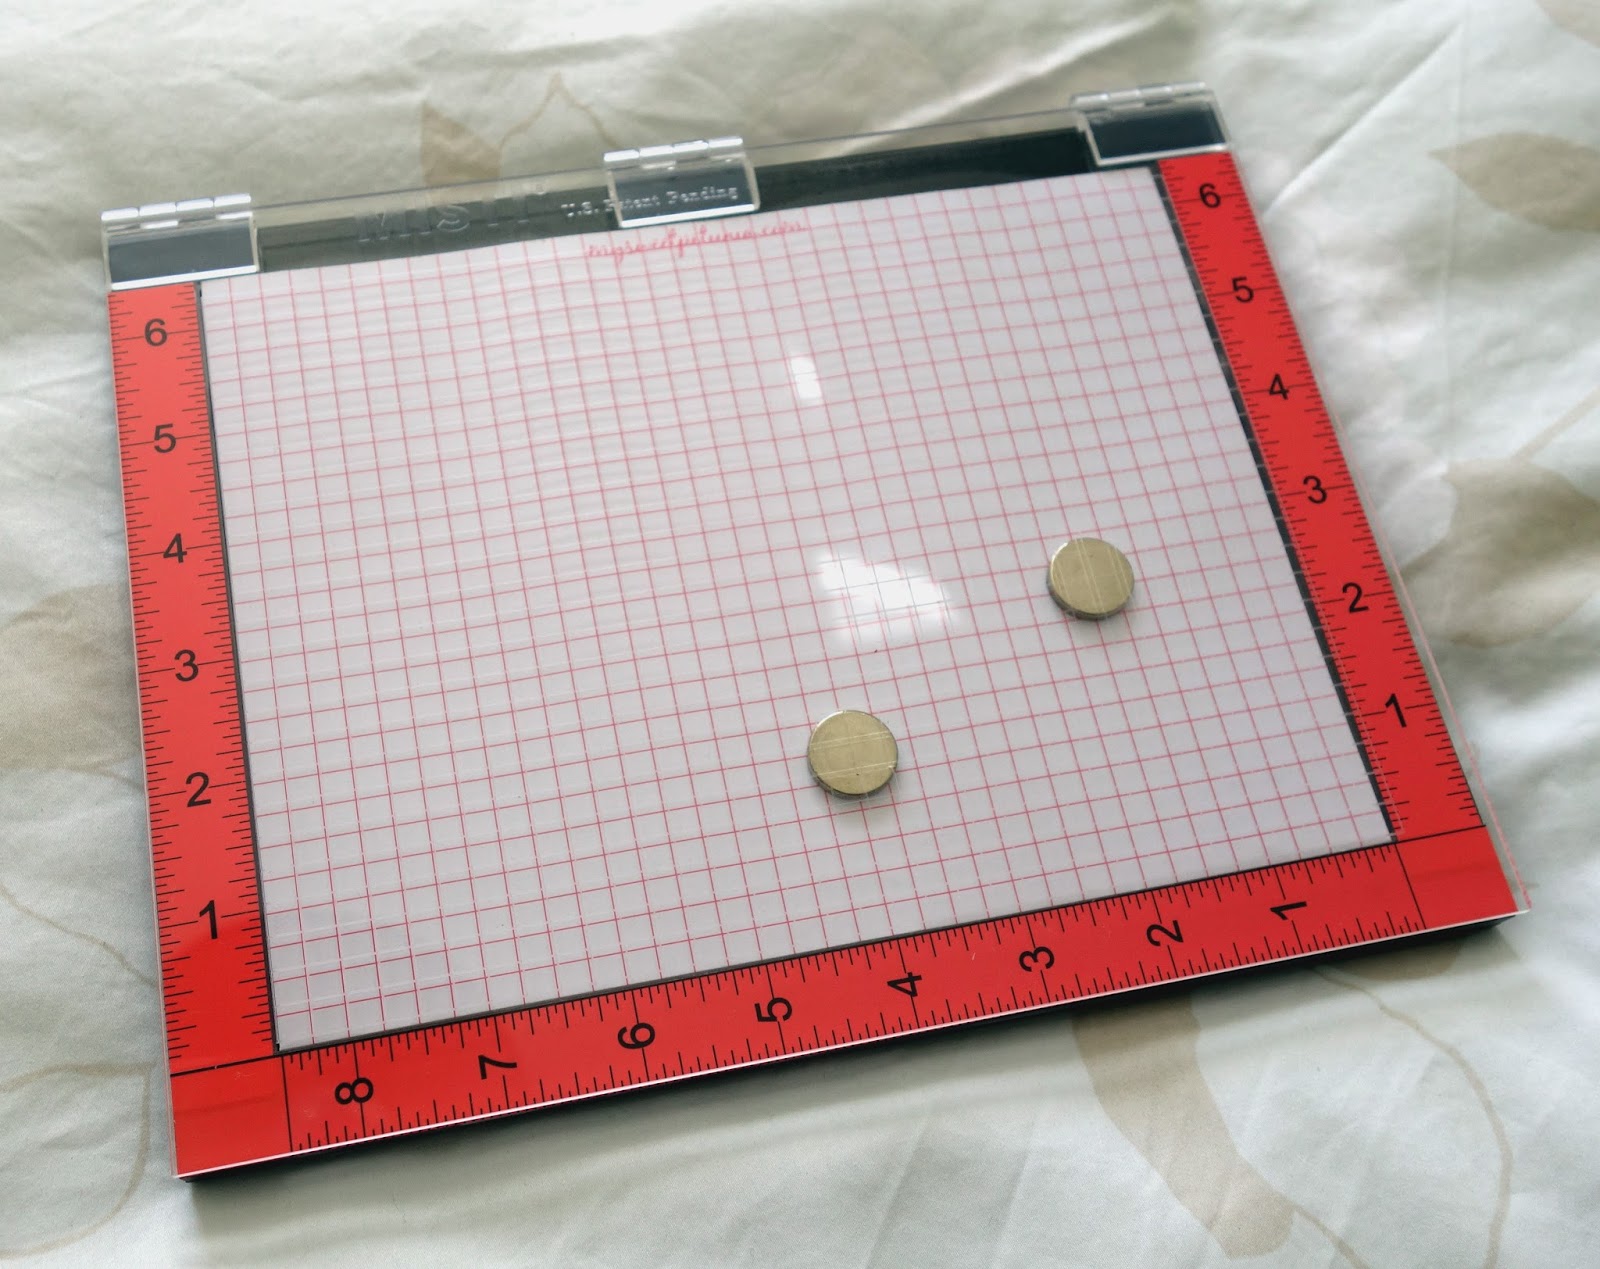
Finally, I was persuaded that I really *needed* to get a MISTI so here it is and I have to say I am excited to give it a go after seeing others use it.


Guess what I will be doing today?!
So maybe I will be back later with a card ;-)

I hope you all have a fabulous Sunday whatever you are up to!

Thanks for visiting and I really appreciate any comments that you leave,