Wednesday, 5 April 2017

Box of dreams

Hello lovely people,

I have a little non-card project to share today using some gorgeous goodies from The Ribbon Girl.

As you can see, this box originally had some extremely scrummy gin truffles in it and since they are sadly now all gone, I thought I'd pretty up the box!


I painted the outside with white acrylic paint then covered the sides and top of the lid with pretty papers, sanding and inking the edges to give a nice vintage feel.

Pretty pink altered circular box


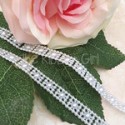
I don't often use pearl string but it was absolutely perfect to put around the edge of the lid :-)

I've finished the top with an inspirational quote and lots of lovely flowers.

Pretty pink altered circular box

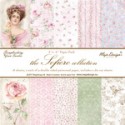
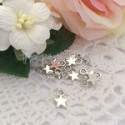
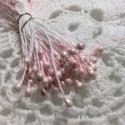
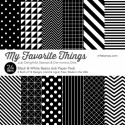
If you find yourself tempted by any of the pretty supplies I've used then you can go straight to the individual products via the thumbnails at the end of my post or just pop over to The Ribbon Girl and have a little browse around!

Thanks for visiting and I really appreciate any comments that you leave,


Sunday, 2 April 2017

LOTV Retro Girls

Hello lovely people,

Have you seen the super cool new Retro Girls images from LOTV yet?

Ok, you can't actually get your hands on them until 3rd April, but then they will be available as Simply Print sheets, digi images and pre-order of rubber stamps.

I finally grabbed a few hours to play with them and thought it would be fun to make a matching set using one of the pair from each decade.

I'm sharing the whole set at once because I do think they look good all together...and I'm too lazy to write 4 separate blog posts for them - lol!

1950s Bobby Socks
 (I think this is my fave of the whole collection)
CAS card with 1950s Bobby Socks by LOTV

1960s Hippy Chick
CAS card with 1960s Hippy Chick by LOTV

1970s Funky Flares
CAS card with 1970s Funky Flares by LOTV

1980s Romantic Rock
CAS card with 1980s Romantic Rock by LOTV

A huge thank you to the fabulous Faye Wynn-Jones for inspiring the colour pop Copic colouring and CAS design of these cards :-)

Thanks for visiting and I really appreciate any comments that you leave,


Card recipe;


Copic colours;
Skin: W00/0/1
Hair: W1/3/5 and W3/5/7
All other grey sections: selection of W00/0/1/2/3/4/5/6/7
Pink: R81/83/85
Purple: BV000/V12/15
Green: YG01/23/25
Blue: B01/02/05/06

Friday, 31 March 2017

Double blooms

Hello lovely people,

It's Friday and therefore time for me to tempt you all with my DT card for Dies to Die For and yes, I'm using MORE lovely new stash!

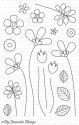
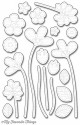
I had lined up my new MFT flower stamps and dies to play around with and came up with a basic design, but then couldn't decide which papers to use.  I had 2 choices, one very modern and one more vintage...so I thought I'd solve the problem by making 2 cards!

Here's #1...

Pink flowers in modern style, using MFT Build-able bouquet stamps and dies

I've stamped the stems directly onto the card and then paper pieced the flowers for this design

Pink flowers in modern style, using MFT Build-able bouquet stamps and dies

Here's #2

Pink flowers in vintage style, using MFT Build-able bouquet stamps and dies

This time I coloured the flowers with Copics and cut them out with the matching dies

Pink flowers in vintage style, using MFT Build-able bouquet stamps and dies

I quickly realised that it was going to take a bit of work to make sure that I got the stamping and die cutting lined up...see those fiddly little stems?!
So, I'm afraid I haven't had time to take photos but I thought I'd share my technique for getting the stamp and die cut perfectly aligned;
- die cut the outline shape from a scrap piece of card
- place the outline on the bottom pad of the MISTI
- place the stamp into the aperture of the die cut then close the MISTI lid so it picks up the stamp
- open the MISTI, place the die cut aperture back over the stamp to double check the alignment
- stamp the flower image onto your cardstock, then colour as desired
- place the die over the top and tape down then die cut
- PERFECT!!

I'm sure you could do the same technique without a MISTI but it definitely makes it a little easier.

If I've tempted you with any of the lovely supplies I've used then you can go straight to the individual products via the thumbnails at the end of my post or just pop over to Dies to Die For and have a little browse around!

Thanks for visiting and I really appreciate any comments that you leave,


Tuesday, 28 March 2017

For a tea-riffic Mum

Hello lovely people,

After working at the weekend, I had yesterday off and spent most of it ignoring the cleaning and pottering about in my craft room instead :-)

It's back to work today but of course I then have my usual Wednesday off and I'm excited that I will be spending it with my awesome buddies Sue and Debs!

I thought today I would share the card I sent to my Mum for Mothers' Day.

Tea-riffic teacup card

I have to admit to using the tea theme on more than one occasion for her but she really does love tea so I'm hoping she will also love this card!

The dies and stamps are by Stampin' Up but no longer available.

Tea-riffic teacup card

I hope you all have a good week :-)

Thanks for visiting and I really appreciate any comments that you leave,


Friday, 24 March 2017

Lighting the candles

Hello lovely people,

I have a Dies to Die For DT card for you today and it's one I made for my nephew...I didn't put an age on the card but can you guess how old he is?!

I was feeling very guilty that I have had the MFT magical dragons in my craft room for at least a couple of months and hadn't used them so I decided to team one of the dragons up with some birthday candles for a fun design.

Birthday card with dragon lighting candles


I used the matching dies to cut out the gorgeously cute dragon so I could have him flying in and lighting up the candles.  I was going to add a little flame but there wasn't really space.

Birthday card with dragon lighting candles


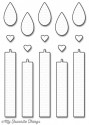
I have a matching stamp set for the candles but decided on this occasion to just cut the candles from DP, and I've added them to the panel with foam pads before wrapping the twine around.

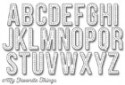
I couldn't resist popping those fab stitched alphabet dies in my basket last week and along with the banner alphabet dies from my previous card, I think they will be very useful; it is lovely to personalise cards and I should do it more often.

Birthday card with dragon lighting candles

If I've tempted you with any of the lovely supplies I've used then you can go straight to the individual products via the thumbnails at the end of my post or just pop over to Dies to Die For and have a little browse around!

Thanks for visiting and I really appreciate any comments that you leave,


Copic colours;
Green: YG23/25/17 (& tiny bit of G07)
Red: R24/29/46
Horns / claws: W1/4

Lovely things I've used from Dies to Die For;


Other ingredients;
Ivory button twine - from stash

Wednesday, 22 March 2017

Sweet birthday wishes

Hello lovely people,

I am still working my way through all my lovely new stash so today I am sharing a card I made for a very lovely lady using lots of my new things :-)

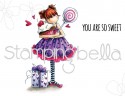
Girly birthday card using Tiny Townie Sammy is Sweet by Stamping Bella

 Since the recipient is such a master with Copics, I thought I'd send her an Inktense card - lol!  To be honest, it wasn't a conscious decision; I find the papers and image just seem to direct me one way or the other or maybe it's just whatever takes my fancy on any particular day!

Girly birthday card using Tiny Townie Sammy is Sweet by Stamping Bella

So, what's new on here?

Well, the papers, the image, the stitched fishtail banners, the stitched banner alphabet and the sentiment...yep, that is actually EVERYTHING on this card!

I am loving all this new stuff but I especially love the cute banner alphabet and I can see it's going to be soooo useful :-)

Girly birthday card using Tiny Townie Sammy is Sweet by Stamping Bella


If I've tempted you with any of the lovely supplies I've used then you can go straight to the individual products via the thumbnails at the end of my post or just pop over to Dies to Die For and have a little browse around!

Thanks for visiting and I really appreciate any comments that you leave,


Inktense colours;
Skin: Baked earth, Madder brown, Saddle brown
Hair: Tan, Saddle brown, Sepia ink
Dress: Crimson, Shiraz
Cupcake: Crimson
Cherry: Shiraz, Red violet
Cupcake case / ground: Neutral grey
Aqua bits: Green aquamarine, Mallard green

Lovely things I've used from Dies to Die For;