Showing posts with label stepper card. Show all posts

Monday, 1 February 2016

Romantic stepper card with tutorial

Hello lovely people,

Gosh, doesn't time fly?!
I intended to post this over the weekend but got carried away with other things...all good!
I hope you all had a lovely weekend whatever you were up to :-)

I have another stepper card to share with you and this time I have done a tutorial to go with it.
I am also showing off some lovely LOTV products on this card as part of the Design Collective.

So, first up I'll show you the finished card and then I'll get into the tutorial.

Romantic fancy fold card featuring dog with balloon (image from LOTV)

I started with a 14.5 x 29cm rectangle of card, and the picture below shows where I made the scores (dashed lines) and cuts (solid lines).

I always start by making little marks on all four edges of the back of the card (what will be the inside) at the indicated measurements on the picture.

Then I make the 2 cuts (the solid horizontal lines) with a craft knife and finally I score the other lines with a very ancient metal toothpick...but I guess any scoring tool that you have will be fine!

This method means that I cut and score exactly the bits that I need to and no more, so you end up with a nice complete back panel and no unsightly extra score lines.


I then gradually fold it up, starting with the middle fold and working down from there.
One of the folds (second from right hand side) is technically scored the 'wrong' way round for folding if you do all the score lines on the back, but I find it's a lot easier to score everything just on one side and just take care when folding it.

I sometimes like to get a little extra space on my central panel so for this design I cut a rectangle of white card and die cut the left and right hand sides, so the finished panel, as below, ended up about 11.5 x 13cm.


I cut rectangles of DP just slightly smaller than the side and bottom panels so a little white border is visible.
As usual, all the panels were inked and stitched.

I wrapped the bottom panel with twine before I attached it.
Now, I've been asked a few times how I attach twine and my main tip is just to fray the end of the twine first so it lays a bit flatter, then I simply tape it down!
Like so...


I then added the pink heart panel and image panel, sliding them under the twine.  I had to be very specific about the order in which I added the layers and twine so I could get the twine on top of the image!

Romantic fancy fold card featuring dog with balloon (image from LOTV)

And I can't finish without a close up of the adorable dog, which Dr. Hubby says is entirely unrealistic because dogs don't have opposable thumbs so there is no way he could hold on to the balloon - lol!
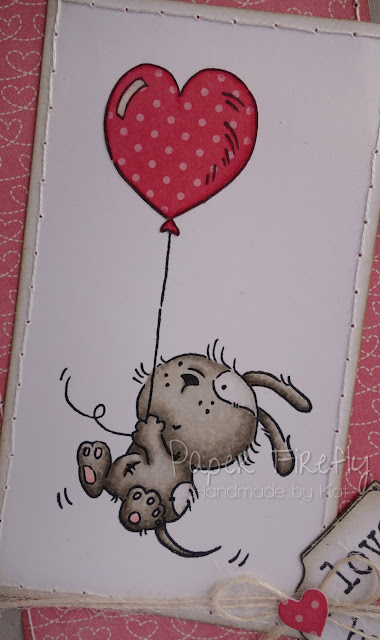
Romantic fancy fold card featuring dog with balloon (image from LOTV)

Card recipe;
Image: Odd Dog  -Balloon - LOTV
DP: Yours truly - Pebbles
Tag: Sentiment tags - LOTV
Dies: Heart flower lace - Magnolia Doohickeys, Heart stems - Impression Obsession
Sentiment:

Copic colours;
Dog: W1/2/3/4/5
Ligt patches on dog: W00/0/1
Shading on balloon: RV34 & blender

The stepper card is not the fanciest of fancy folds but it's one I really like and I hope some of you may find something of use in my tutorial, so thanks for reading :-)

Thanks for visiting and I really appreciate any comments that you leave,


Wednesday, 20 January 2016

Fairy with presents

Hello lovely people,

Happy Wednesday!  I do like Wednesdays because it's Dr. Hubby's day off so we will be heading out for a coffee date this morning and then I usually get in some crafting time while he plays/makes computer games :-)

While I enjoy making a mess in my craft room, it's time for a new challenge at Creative Inspirations and we have the theme...

ANYTHING GOES
(+/- optional sketch, which you can find on the sketch page)

Our sponsor this time is All Dressed Up with a prize of 2 digi images of the winner's choice.


I decided to create a stepper card since I haven't done one for a while, but I'm afraid I didn't have time to write a tutorial for it.  Watch this space though because I love how it turned out so just might have to do another one!

Here's a little tip though; I created more space on the central panel of my card by adding a piece of card a bit larger than the panel on the base card and giving it some fancy edges.

Stepper card featuring fairy with a pile of presents (image from ADU)

I picked the colours for this image to match the papers I had chosen and then I didn't actually use any of the papers with the salmon pink colour, but I do think it makes a nice contrast with the mint green and grey.

This sweet fairy is actually a Christmas image but I think she makes a nice birthday card too!

Stepper card featuring fairy with a pile of presents (image from ADU)

I kept this card pretty free of embellishments to give it a fresh modern feel but did sprinkle a couple of enamel dots on there...I always mean to use these more often!

Stepper card featuring fairy with a pile of presents (image from ADU)

Card recipe;
DP: Cottage living (by Jen Hadfield) - Pebbles
Dies: Old Swedish lace - Magnolia Doohickeys
Sentiment: A little sentimental - Clearly Besotted

Copic colours;
Skin: E000/00/21/11/04 & R20
Hair: E41/43/47
Dress / presents / ribbon: R30/32/22
Wings / presents / ribbon: G0000/000/00/BG32
Present / ribbon: T2/3/4/5
Star label: T0/2/3
Ground: T0/1/2/3/4

The DT have made some wonderful samples to inspire you so pop over to Creative Inspirations to take a look :-)

Thanks for visiting and I really appreciate any comments that you leave,


Challenges I am entering;
The Ribbon Girl - any image

Thursday, 4 December 2014

Snuggle up

Hello lovely people,

Here we go again with a new challenge at Crafty Little Fairies and very sadly, it is our last ever challenge :-(

Our final theme for you is... HOLLY AND/OR IVY

Well, it pretty much had to be another Christmas card with that theme didn't it?! 
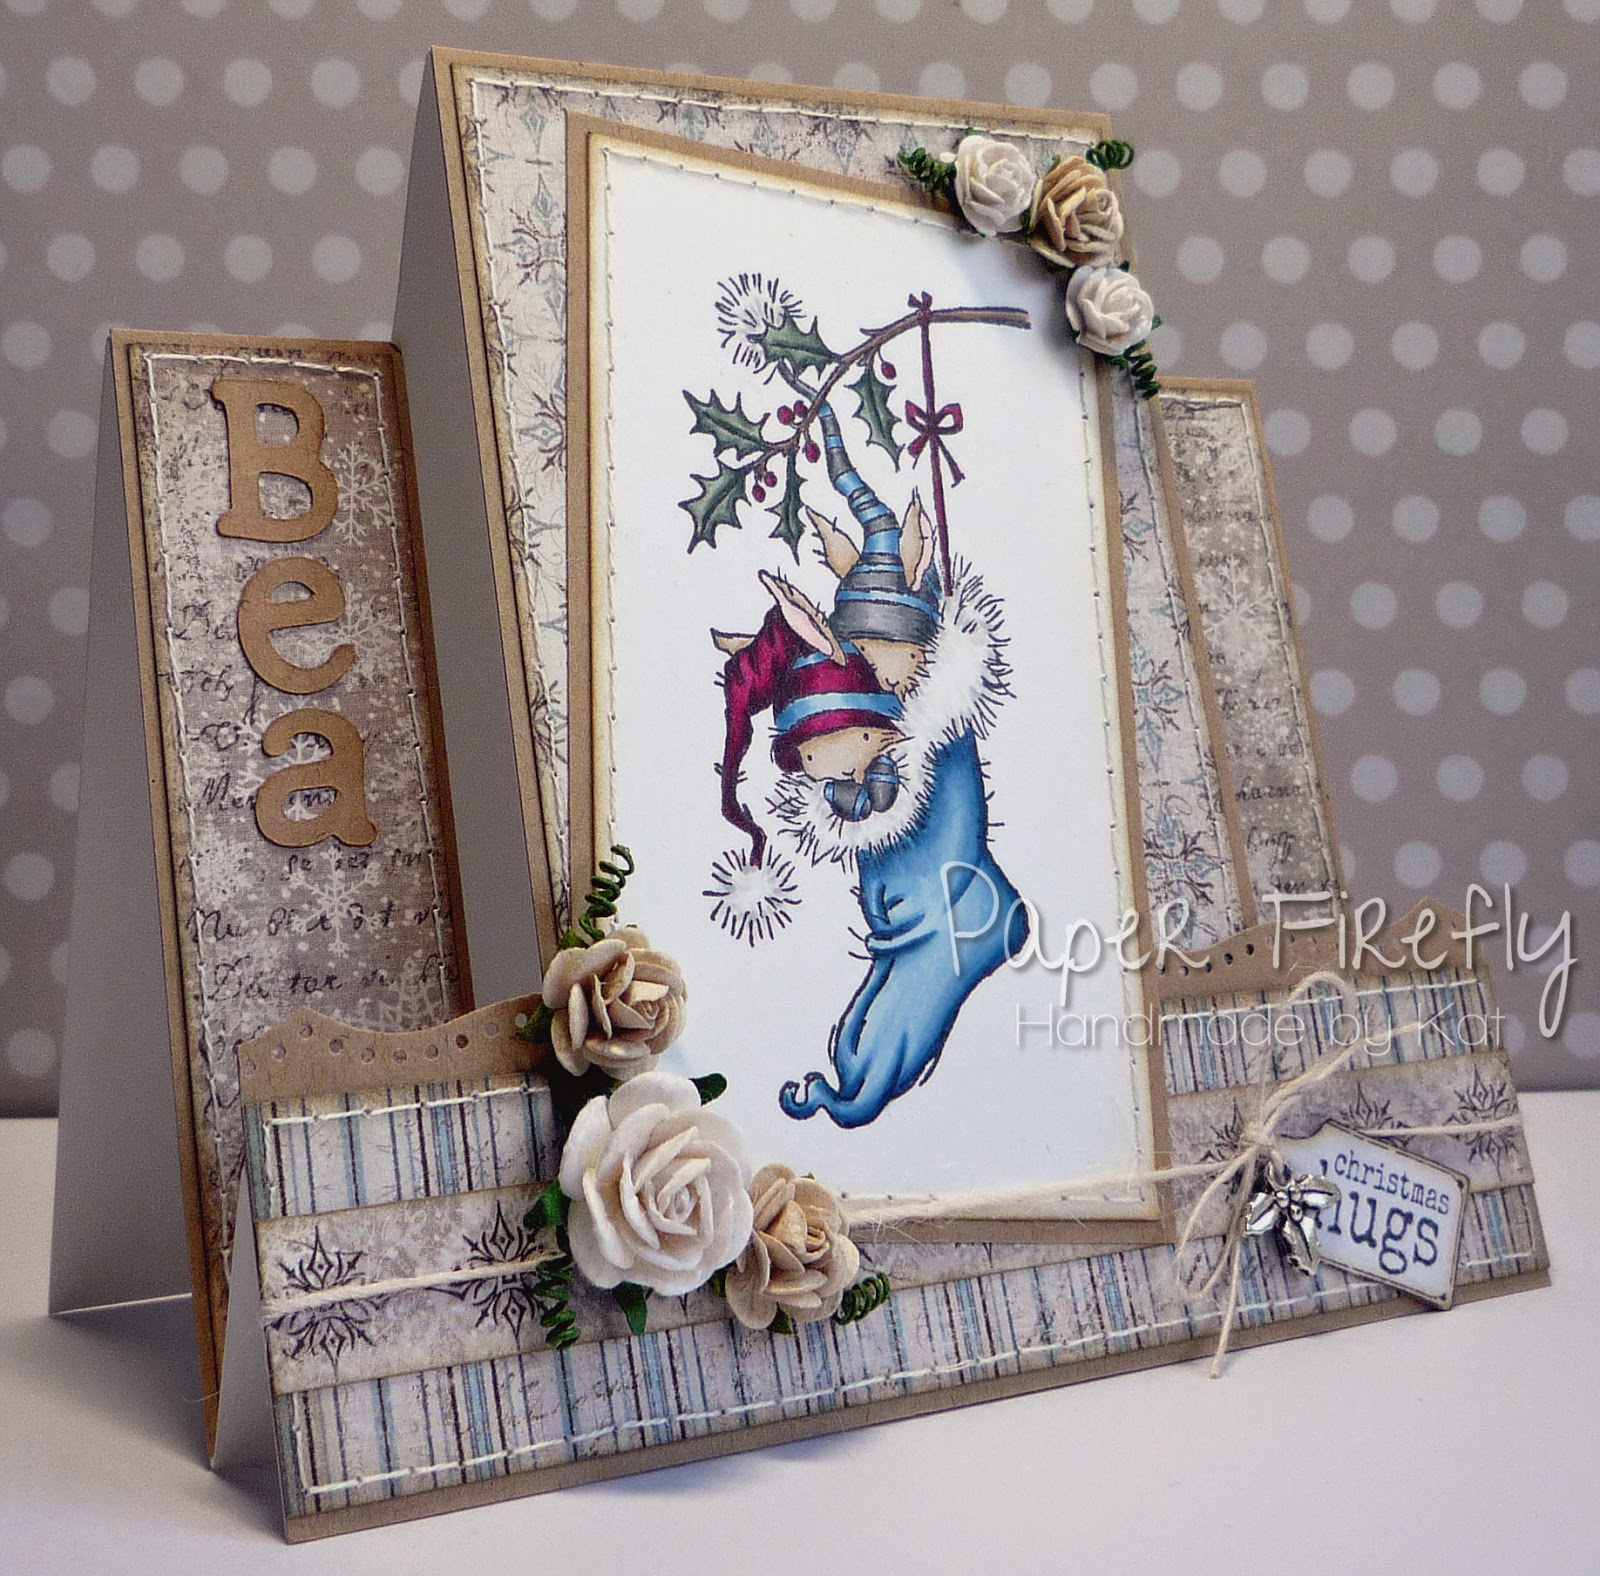
I've done a stepper design and there is holly both on my image and the little charm I added.


These stepper designs are great for using up quite small bits of DP and I love adding a little detail to the top of the front step with a border punch.


I always add a strip of card in the centre of my stepper designs so that it can't slip open when standing so I thought I'd show you, just in case you're interested!


And this post wouldn't be complete without a close up of the sweet bunnies all cosy in their stocking.


Card recipe;
Image: from LOTV but now discontinued
DP: Vintage Frost Basics - Maja Design (available from Live and Love Crafts)
Tag: Christmas sentiment tags - LOTV
Punched edge: Cherish (punch around the page) - Martha Stewart
Kraft letters: cut with my Cricut

Copic colours;
Bunnies: E40/41/42
Hats: B91/93/95 & T3/4/6 (right) & R39/89/99 (left)
Branch: E43/44/47
Leaves: BG93/96/99
Berries / bow: R39/89/RV99
Fur on stocking/hat bobbles: T0/1/2

If you pop over to Crafty Little Fairies you can check out the beautiful creations from my teamies and details of the four prizes on offer from some fabulous sponsors.

Thanks for visiting and I really appreciate any comments that you leave,


Challenges I am playing along with;
1.  Papertake Weekly (anything goes)
2.  Simon Says Stamp (Christmas/holidays)
3.  Divas by Design (feeling festive)

Sunday, 3 August 2014

Baby bunny

Hello lovely people,

Yes, it's that time again where we share some gorgeous new images with you at All Dressed Up and this time they are all themed for new babies and baby showers.  Just take a look at this bunch of cuteness...

A Star is Born

Future Little Crafter

My Baby Shower

Night Night Little One

And this time we also have some matching papers for you;

If anything there has caught your fancy then head over to the shop to check it out but first, here's what I made...


As usual I have added lots of stitching detail and used die cut swirls to frame the image - I really like how this turned out :-)
Here's a little angled shot so you can see the stepper layers...


Card recipe;
DP: Petal fresh - LOTV
Tag: Sentiment tags - LOTV
Flowers: Wild Orchid Crafts
Loopy edge: Martha Stewart edge punch
Dies: leaf and swirl - Magnolia Doohickey

Copic colours;
Fur: YR30/E41/42
Inside ears / feet: R0000/000/00
Flower: B41/91/93 & YR30/Y21

Do pop over to All Dressed Up to see what the rest of the Dressy Girls have created; they are all stunning! While you're there, check our our current 'Anything but a square' challenge and we'd love to see you join in for a chance of winning 3 images of your choice!

Don't forget to swing by our Facebook Group to share your creations and chat to fellow All Dressed Up lovers :-)

Thanks for visiting and I really appreciate any comments that you leave,


Challenges I am playing along with;
1.  Divas by Design (anything goes)
2.  Simon Says Stamp (anything goes)
3.  The Ribbon Girl (anything but square)
4.  Pile It On (stitching)

Sunday, 1 June 2014

Scrap n' Art with All Dressed Up

Hello lovely people,

Thank you for stopping by and I have a very special project to share today as one of my cards has been published in the latest issue of the Scrap n' Art online magazine.


Scrap n' Art is an electronic magazine packed with articles, tutorials and inspiration all the paper crafter and has a reader base of over 20,000.

Wendy Burns and three brand new, exclusive All Dressed Up images are being featured in the current issue plus several of the design team have submitted projects.

The three exclusive digis are:
Love My Teddy

Princess for a Day

Too Good to Eat

These three digital images are currently available only by subscribing to Scrap n' Art.  Your subscription entitles you to a monthly magazine for $24/year or you can try it for $5 for one month and you can access tutorials, inspiration, editorials and downloads.

For my card, I used another cute image currently available in the All Dressed Up Etsy store called Little Flower Girl.  I went for a taste of summer with this design, choosing bright colours and florals.


I just LOVE this little lady's gorgeous huge sun hat although it was a little bit of a challenge to colour!  I cut out an extra flower for her hat and popped it up on a 3D pad, then added liquid pearls to the middle of the flowers in the basket.


I've used my fave twine and flowers combo to embellish; I'm still loving the 3D flowers right now!


One more shot from the side so you can see the stepper design I used;


Card recipe;
DP: Park Bench - Echo Park
Dies: leaf and swirl - Magnolia Doohickey, butterfly set - Impression Obsession
Edge punch: Scallop dot - Martha Stewart
Flowers: all from Wild Orchid Crafts

Copic colours;
Skin: E0000/50/000/51/21 & R30
Hair: E41/Y21/E42/E43
Dress / hair bows: BG10/11/13
Bag / ground: W0/2/3/4
flowers / hat / bow on bag: Y15/19/YR14
Leaves: G46
Bird: E42/43

I am back from my holiday now and feeling very refreshed but that will probably only last until I get into work on Monday morning and see my inbox!

Thanks for visiting and I really appreciate any comments that you leave,

Hugs,
Kat xx


Thursday, 5 December 2013

Candy Stripes at Crafty Little Fairies

Hello lovely people,

I am having a lovely couple of days off work at the moment and trying to get organised for Christmas...not sure I'm succeeding all that well!

Anyway, it's time for a new challenge at Crafty Little Fairies and our theme this week is...

CANDY STRIPES

So we are looking for stripes of white and another colour, usually red, or maybe some actual candy canes on your creation.  I had to rummage for quite some time for something suitable before I remembered some Christmas DP I had left over from 2 years ago.  It was one of my favourite DPs and there were only scraps left so I had to be quite creative in using them.


This theme was the perfect excuse to use one of the Saturated Canary images that I got on a CD ROM with a magazine because she has a candy cane!  And she is just adorable and fabulous fun to colour up :-)


I'm enjoying making different fancy fold cards at the moment so did a stepper design here; it's great because once the panels are stitched and layered they don't need a lot of embellishment.  I did break out my new holly vine die which I have been waiting for the right card to use!


Card recipe;
Image: Candy Cane Elf - Saturated Canary (not available in the store)
DP: North Pole collection - Crate Paper
Dies: holly vine - Memory Box
Fancy edge: Martha Stewart edge punch

Copic colours;
Skin: E0000/000/00/11/21 & R30
Hair / boots: E44/47/49 (& black on boots)
Eyes: E43/44
Red on hat / leggings: R27/29/39
Green hat / leggings / dress: YG13/17/67
Candy cane: R24/27/29 & C00/0/1

I would like to enter this card in the following challenges;
1.  Papertake Weekly (anything goes)
2.  Divas by Design (feeling festive)
3.  As You Like It (fave digi - I adore the Saturated Canary images as they are so beautiful and fun to colour and the newest addition to my collection is always my fave!)
4.  The Ribbon Girl (christmas)


The rest of the Fairies have made some lovely candy striped cards so do pop over to Crafty Little Fairies to check them out.

Thanks for visiting and I really appreciate any comments that you leave,

Hugs,
Kat xx