Saturday 31 December 2016

Peaceful snowy church

Hello lovely people,

I wasn't planning to share any more Christmas projects now the big day has been and gone, but I am going to make an exception for two more posts...and here is the first one.

I found myself gravitating towards very muted colours when choosing the papers for this card and really liked the end result, plus it's a little bit different.

It's also one of the very few projects that I made using my gorgeous new snowflake dies; I hope to use these much more next year!

Snowy church Christmas card (image from LOTV)


This beautiful church scene is from LOTV and this image makes me feel very peaceful...and it was very therapeutic to colour too with my Inktense pencils.

I added delicate lines of sparkle across the tops of the snow and trees and on all the snowfall dots, using a Quickie glue pen and loose white glitter, and the whole scene sparkles beautifully...IRL!

Snowy church Christmas card (image from LOTV)


I hope you all have a lovely last few hours of 2016; I think a lot of people are going to be glad to see the back of it!

Thanks for visiting and I really appreciate any comments that you leave,


Card recipe;
Image: Christmas scenes - Snowy church - LOTV
DP: A gift for you - Maja Designs
Dies: Stylish snowflakes - MFT Die-namics
Sentiment: computer generated

Inktense colours;
Church stonework: Indian ink
Windows: Sicilian yellow
Trees: Light olive
Snow: Iris blue
Path / tree trunks: Tan, Oak

Tuesday 27 December 2016

Sewing themed embroidery hoop in lilac

Hello lovely people,

I hope you all had a wonderfully merry and joyful Christmas because I know I most certainly did :-)
There's not much better than spending time with loved ones and eating/drinking yourself silly for a few days!

I do still have a few Christmas projects that I didn't get round to sharing but for now I thought I'd share something non-Christmassy.

It's another decorated hoop but as this one is 5", so a bit larger than my previous 2 hoops, I decided to back it with DP and add all the embellies inside.
Most of these pretty things are from The Ribbon Girl and all the links are at the end of my post.

Decorated 5" embroidery hoop in lilac with sewing theme

I really loved choosing and arranging all the little bits and pieces in co-ordinating colours.

The tape measure is a freebie stamp and the dress form was from a newly(ish) purchased sewing themed die set that I'm looking forward to using some more.

Decorated 5" embroidery hoop in lilac with sewing theme


If you are already back to work then I hope it's ok and if not, enjoy the rest of your time off.

I have the rest of today and tomorrow to chill out and craft before I go back to work on Thursday.

Thanks for visiting and I really appreciate any comments that you leave,


Wednesday 21 December 2016

Let it snow hoop

Hello lovely people,

I had a busy morning of shopping and baking then took some time out to relax with my fabulous buddies Sue and Debs this afternoon; just chatting, drinking tea/coffee and eating scrummy soup and cake :-)

Now I'm just off to watch an old episode of Sherlock (catching up before the new season in January - excited!) with Dr. Hubby but thought I'd quickly share another Christmas project first.

This is another 3" decorated wooden embroidery hoop.

Snowflake decorated embroidery hoop

The sparkler on the snowflake is just gorgeous and I added a little more sparkle with some silver twine to hang it up.

The sentiment is computer generated.

Snowflake decorated embroidery hoop


Well, that's it from me..short and sweet!

Thanks for visiting and I really appreciate any comments that you leave,


Card recipe;
DP: Snow Queen - Galleria Papieru
Dies: Large snowflake - Noor! Design
Silver metallic twine - The Ribbon Girl
Sparkler gem: from stash

Sunday 18 December 2016

Candy Canes

Hello lovely people,

With just 1 week to go until the big day I think it's going to be wall to wall Christmas on my blog until then as I have a few Christmas projects I haven't shared yet.

Today we have a new 'Any Image' challenge on The Ribbon Girl blog so you can create any project you wish as long as you include an image on it.
As always, there are several fab prizes up for grabs.

You can find the list of all the gorgeous goodies I used from The Ribbon Girl at the end of my post.

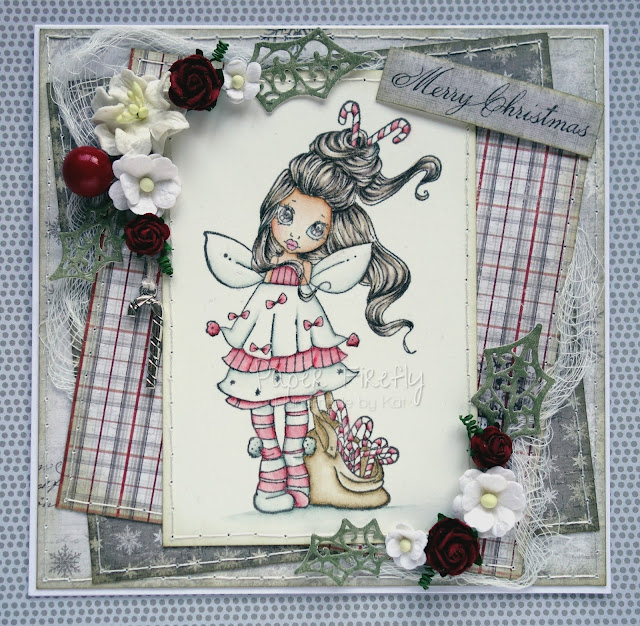
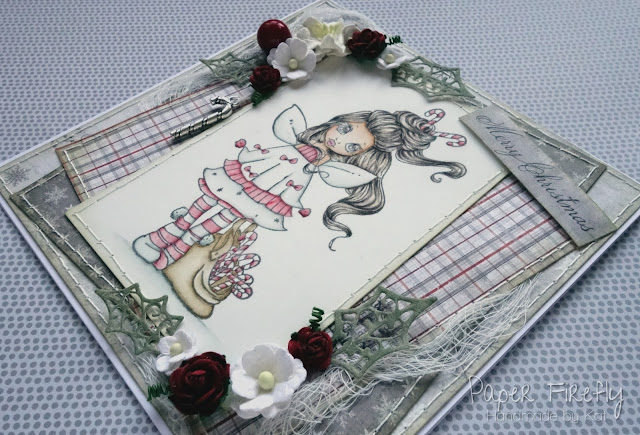
Cosy Christmas card in red and grey with candy cane fairy


This stamp was a present from a lovely crafting buddy last year and I am soooo ashamed that this is the first time I've got round to using it, especially as I absolutely adore it.

I have given her the Inktense pencil treatment :-)

Cosy Christmas card in red and grey with candy cane fairy

I had the perfect little charm to go with this image and then added some festive looking foliage and flowers.

Cosy Christmas card in red and grey with candy cane fairy


I am still Christmas crafting; today I am making little gift boxes.

I hope you have a super Sunday :-)

Thanks for visiting and I really appreciate any comments that you leave,


The Ribbon Girl products;
Cheesecloth fabric
White sweetheart blossoms
Miniature white blossoms
Ivory button twine
Silver candy cane charm
Red round shiny berries

Other products;
Image: Candy Canes - Saturated Canary
Papers: A gift for you - Maja Designs
Other flowers: from stash
Dies: Filigree holly - Sue Wilson for Creative Expressions

Inktense colours;
Skin: Baked Earth, Carmine Pink, Saddle Brown
Hair: Oak, Bark, Ink Black
All red bits: Chilli Red, Madder Brown
All grey bits: Charcoal Grey
Bag: Saddle Brown, Oak
Saturday 17 December 2016

LOTV new release: Delightful daisies

Hello lovely people,

The weekend is here and Dr. Hubby and I started it in style this morning with a breakfast at our favourite coffee shop; we had Eggs Royale and tea (Dr. Hubby) / cappuccino (me) - sooooo yummy :-)

Can you believe that this time next week it will be Christmas Eve?!  Are you all ready and feeling festive?

It's going to feel more Spring-like than Christmassy with my blog post today as I have my final DT card share with one of the new LOTV releases, which are now available!
You can find them all as rubber stamps and digi stamps.

I felt that a CAS card would work well to showcase this gorgeous image.

Cute floral card using Delightful Daisies image from LOTV

I have been absolutely in love with all the cute new images but if I was forced to choose, I think this would be my favourite :-)

Cute floral card using Delightful Daisies image from LOTV


Although this is the last of my promotional cards for these images, this will definitely not be the last you see of them as they are so gorgeous.

I hope you all have a wonderful weekend whatever your plans are :-)

Thanks for visiting and I really appreciate any comments that you leave,


Copic colours;
Mice: E30/31/55 & R000/01
Flowers: YR30/Y32/Y35/YR23 (&YR27 in centres)
Leaves: G40/82/24
Jug: C00/0/1/2 & R81/83/85
Tag: E40/41/42/43
Ladybird: R27/46
Flowerpot: E97/99/39
Ground: W00/0/1/2/3/4

Thursday 15 December 2016

LOTV new release: elephant trio tag card

Hello lovely people,

I am sharing another DT card using one of the new releases coming out on Friday from LOTV so that's only 1 sleep to go!

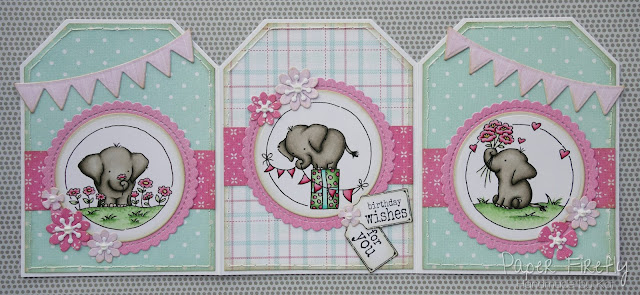
This time I've used the elephant trio stamps and printed these digis the same size as the rubber versions.  I've used a tri-fold tag card to showcase all 3 images and I cut the base card and tag layers by hand.

Tri-fold tag card using elephant trio from LOTV


I was aiming for a fairly flat design so that it would fold up nicely, although the pearls ruin that slightly...but look so pretty!

I totally forgot to take any more pictures of this after it was made up but I do have close up shots of the elephants.

LOTV elephant trio stamps

This is my fave of the trio, probably because I love bunting...and presents of course!

LOTV elephant trio stamps

I just love colouring elephants for some reason, especially when they are so utterly charming like these ones.

LOTV elephant trio stamps

I hope you are getting excited for the new release tomorrow and I'll be back with a final card to share with you :-)

Thanks for visiting and I really appreciate any comments that you leave,


Card recipe;
Image: Elephant trio - LOTV
DP: from stash
Tag: Sentiment tags - LOTV
Dies: Stitched scallop- circles - MFT Die-namics, Circle stax - MFT Die-namics, Party banner - Couture Creations, Flower mix - Craft Emotions

Copic colours;
Elephants: W1/2/3/4/5 & R000/01
Flowers / bunting / hearts / present spots: R81/83/85
Leaves / grass: G40/82/24
Present ribbon: BG10/11/13

Saturday 10 December 2016

LOTV new release: 3 kind mice

Hello lovely people,

I said I wouldn't keep you waiting long so here is the first of my DT cards showcasing one of the new releases (available from 16th Dec) from LOTV.

You get all 3 mice in this set and I think using just one of these images would make a fab card but I thought the 3 in combination might be nice to celebrate moving into a new home.

I've re-sized the digi stamps to fit inside the polaroid frames, which just happened to fall in my basket recently ;-)  I think they will see lots of use; aren't they just awesome?!

The 2 smaller framed images are layered on foam pads to add dimension to my very CAS design.

CAS new home card featuring 3 cute mice (images from LOTV)


Mouse #1 would also be great for romantic occasions especially if you teamed it with one of the sentiments designed to match the images which reads 'you hold the key to my heart.'


Mouse #2 is lovely for thank you cards, birthdays...anything really!


Finally, mouse #3 is my favourite because she clearly knows how to have a good time; just look at the size of that bottle!


I can't wait to show you even more of the cute images and you only have 6 sleeps to go until you can get your hands on them!

I hope you are all enjoying your weekends :-)

Thanks for visiting and I really appreciate any comments that you leave,


Card recipe;
Image: 3 kind mice - LOTV (coming soon!)

Copic colours;
Mice bodies: E30/31/55
Mice tummies: YR30/E30/31
Mice ears / feet / tails: R000/01
Bottle: YG93/95/97 & B0000/00
Flowers: R81/83/85
Leaves: G40/82
Key: W1/3/5
Label: W00/0/1
Ground: W00/0/1/2

Friday 9 December 2016

LOTV teaser

Hello lovely people,

Ooooh, what do we have here then?!


It's a sneek peek of one of the new LOTV images being released on Friday 16th December!

Shall I tease you just a little more?  Oh, go on then...


Well, all I can say is that I think you will adore the new images because they are cute, cute and more CUTE!  Plus there are LOADS of them too so you will be utterly spoilt for choice :-)

You won't have to wait long to see all the full images as the Design Team and Design Collective will be showcasing them over the next week.
I've got several cards to show you so do pop back in and allow me to tempt you some more!

Thanks for visiting and I really appreciate any comments that you leave,


Thursday 8 December 2016

Winter fairy

Hello lovely people,

I'm going to get straight down to business today...


We have a new challenge starting at In The Pink and our theme this time is...

CHRISTMAS
Don't forget we want to see more pink than any other colour!

Our fabulous sponsor this time is Polkadoodles with a £6.75 voucher

I kept this pretty simple because it's nice to give the image 'room to breathe' and I think you'll agree that this lovely new die really makes a statement too!
The double stitched circle die is also new ;-)

Fairy Christmas card (image from Polkadoodles)

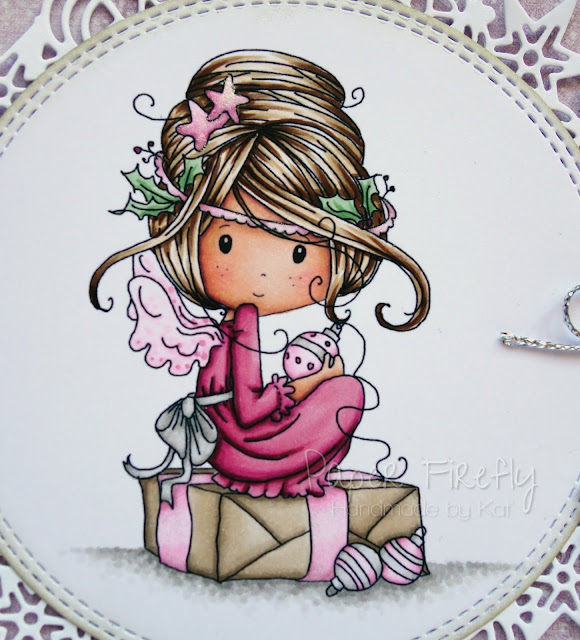
This gorgeous image is from the Polkadoodles Winnie Winterland collection and I reckon she looks so pretty in pink.

I've added a subtle sparkle to the stars, headband and present ribbon with a Spectrum Noir clear sparkle pen...use your imagination - lol!

Fairy Christmas card (image from Polkadoodles)

I've used one of my new favourite products which is the sparkly twine from The Ribbon Girl...this is soooo gorgeous!  The snowflakes are new in stock at The Ribbon Girl and are the nicest design I have ever seen...and I've purchased quite a few snowflake charms over the years!


Fairy Christmas card (image from Polkadoodles)


If you haven't already done so then do pop over to In The Pink and check out the gorgeous creations from the rest of the Pink Ladies.

Thanks for visiting and I really appreciate any comments that you leave,


Copic colours;
Skin: E000/00/21/11/04 & R20
Hair: E51/55/57
Dress: Rv32/34/R56
Present ribbon / Baubles / Wings: RV000/10/32
Dress ribbon / baubles: W00/0/2
Holly: YG61/63
Box: E41/42/43
Ground: W00/0/1/2/3

Wednesday 7 December 2016

Be merry embroidery hoop

Hello lovely people,

I love a good craft room day...and today has definitely been one of those!  There's still plenty more time to keep on crafting as Dr. Hubby is away so I can craft as long as I like ;-)

I thought I'd take a little break from colouring to show you something a bit different; it's a 3" embroidery hoop that I have made into a Christmas decoration.

I glued DP to card so it was nice and sturdy then covered the front and the back of the hoop.

Embroidery hoop Christmas decoration with poinsettia in traditional colours

I used my beautiful poinsettia die and various snipped up die cuts to add decoration and finished it with a computer-generated sentiment and pearls.

The back is covered with DP but otherwise left plain.

Embroidery hoop Christmas decoration with poinsettia in traditional colours


I really loved making this and was delighted with how it turned out so do let me know what you think of it :-)

Thanks for visiting and I really appreciate any comments that you leave,


Card recipe;
DP: A gift for you - Maja Design
Dies: Circle STAX - MFT Die-namics, Stitched poinsettia trio - Poppystamps, Tall Chloe stem - Memory Box, Fancy flourish - MFT Die-namics


Thursday 1 December 2016

Special delivery

Hello lovely people,

Wow, it got cold!  Really really cold!  That's not a complaint though, and the thick frost was soooo beautiful when I went out for a little walk yesterday.  I think my heating stayed on all day though - lol!

And I stayed tucked up in my craft room :-)

It seems like I haven't done that much colouring lately, maybe because I am focusing on quicker makes for Christmas and maybe because I've had some new stash that has pushed me towards other techniques/styles such as die cutting and chipboard shapes.

Whatever the reason, I think I need to get back to more colouring so on that note I have a card with colouring to share today!

I made this a few weeks ago for a commission and I think baby girl cards might just be my fave type of cards to make...well, there's so much cuteness and pink you can add!

Shabby chic baby girl card (image from LOTV)

I just realised that this image is no longer available from LOTV (not even in digi format), which is very sad because it's such a gorgeous one.

Since I have this as a rubber stamp and was using such pale papers, I opted to colour it with Inktense pencils and was especially please with my first attempt to colour a cardboard box with them!

Shabby chic baby girl card (image from LOTV)

Once the colouring and basic layout was done it was on to my favourite bit of the creative process...flower arranging!  It's also probably one of the bits that takes me the longest because the flowers all have to be just right and I'm such a stickler for co-ordination!

Shabby chic baby girl card (image from LOTV)

I hope everyone's week is going well and if not, sending hugs your way.

Thanks for visiting and I really appreciate any comments that you leave,


Card recipe;
Image: discontinued (by LOTV)
DP: Vintage baby - Maja Design
Dies: Precious stars - Memory Box
Silver baby feet charm - The Ribbon Girl

Inktense colours;
Skin: Baked Earth, Carmine Pink, Madder Brown, Saddle Brown
Jumper / bear: Carmine Pink
Box: Tan, Saddle Brown, Oak
Label / ground: Indian Ink

Monday 28 November 2016

Frosty and sparkly(ish)

Hello lovely people,

Whooosh!  That's the weekend flying by again!  We spent a lovely Saturday with my 2 sister-in-laws, 3 nephews and 1 niece, and then on Sunday I was busy crafting items for my very first Craft Fayre in just 5 days time!  It's been fun creating some non-card projects and of course I will share all of them with you in due course!

In the meantime, I have a card to share with you using some gorgeous goodies from The Ribbon Girl (see list at the end of my post for all the details). 

Despite all the pretty flowers and beaded bits, this somehow still ended up more CAS than I had envisaged, but I tried adding more and it didn't work for me so it is what it is!

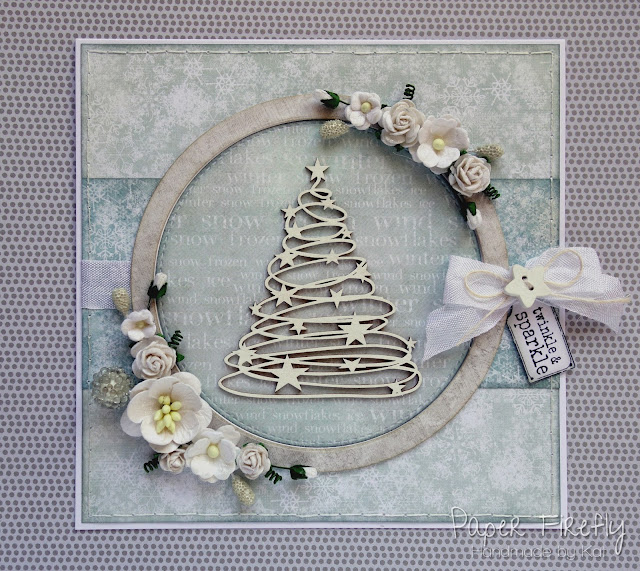
These papers are such gorgeous frosty colours and I just knew they would work well with the chipboard tree...although I did have to hunt high and low for where I had 'safely' stashed the tree after I bought it - lol!

Frosty Christmas / Winter card with chipboard tree and flowers

I've stacked up a few circular die cut frames to give a little height and layered a stitched die cut circle inside.

I dabbed white acrylic paint onto the tree and star, and then added sparkle to the stars on the tree and over the flowers using a Spectrum Noir clear sparkle pen.  I've got a clear Wink of Stella pen but I think the SN pen seems a bit more sparkly...although both are very camera shy - lol!

Frosty Christmas / Winter card with chipboard tree and flowers

I hope you all have good weeks, whether you are working or otherwise occupied or just doing nothing!

Thanks for visiting and I really appreciate any comments that you leave,


The Ribbon Girl products;
Craft and You 'Frozen' 6x6 paper pad
Scrapiniec chipboard Christmas trees
White cherry blossom
White sweetheart blossoms
Miniature white blossoms
White beaded cherry
White seam binding
Ivory button twine
Wooden star buttons

Other products;
Other flowers: from stash
Dies: Circle STAX, Inside/outside stitched circle STAX - MFT Die-namics
Sentiment tag: Christmas sentiments tags - LOTV

Thursday 24 November 2016

Odd Dog with flowers

Hello lovely people,

I am hoping to have a productive crafting day today but first I have a little DT project to share with you.


It's time for a new challenge at In The Pink and our theme is...

CUTE AND CUDDLY
Don't forget we want to see more pink than any other colour!

Our fabulous sponsor this time is the fabulous Dies to Die For with a £10 voucher

I used a fair few new bits of stash on this card, which I always love to do.  The papers are old but new to me, and the frame and flower dies are new too :-)

Pink card with die cut details and LOTV image 'Odd Dog - bunches of love'

Odd dog is most definitely cute and cuddly and you can find this image plus loads more gorgeous new Odd Dog digis over at LOTV :-)

For this card I printed the digi image quite small but you can see that it still looks great on a standard 14.5cm square card.

Pink card with die cut details and LOTV image 'Odd Dog - bunches of love'


If you haven't already done so then do pop over to In The Pink and check out the gorgeous creations from the rest of the Pink Ladies.

Thanks for visiting and I really appreciate any comments that you leave,


Card recipe;
DP: Paris flea market - Pion Design
Dies: Greek Island collection (Rhodes) - Sue Wilson for Creative Expressions, Flower mix - Craft Emotions

Copic colours;
Odd dog: W00/0/1 & E31/35
Flowers / bow: R20/21/32
Flower centres: Y32/35
Stems: YG95/97
Ground: YG93/95/97