Thursday 28 January 2016

Romance in an umbrella

Hello lovely people,

I've been in Bath studying for a couple of days and Dr. Hubby has been working away for a few days so we are now re-united and going to enjoy a day together...I think it's coffee date time!

It's also time for a new challenge at As You Like It and our theme is...

YOUR FAVOURITE...1 LAYER OR MULTI-LAYER
...and don't forget to tell us why it's your favourite!

Our sponsor this time is Crafts-U-Love with a £10 voucher

I love to make multi-layered cards as I enjoy combining lots of pretty papers and it works well with the slightly vintage style that I like.

Romantic vintage style wedding card featuring cute mice in an umbrella (image from Crafter's Companion)

Sometimes I find it hard to achieve a soft look when colouring with Copics but I was delighted with how this turned out :-)
The umbrella was tricky because BG70 is so much lighter than BG72 that it is really hard to blend it nicely but I used a bit of 'tip to tip' technique and it worked a treat.
If you haven't come across this technique before, I coloured the image as I usually would but then touched the tip of BG70 on to the nib of BG72 to pick up a bit of the darker colour and applied this to the image to smooth out the shading between these 2 colours on my image.

Romantic vintage style wedding card featuring cute mice in an umbrella (image from Crafter's Companion)

I finished off by adding a couple of random lacy edges, some flower clusters and a little metal charm...ah, so romantic :-)

Romantic vintage style wedding card featuring cute mice in an umbrella (image from Crafter's Companion)

Card recipe;
Image: True love - Everyday in Moonbeam meadow - Crafter's Companion
DP: Summer Crush - Maja Design (available from Live and Love Crafts)
Tag: Sentiment tags - LOTV
Dies: Old Swedish lace - Magnolia Doohickeys

Copic colours;
Umbrella: BG70/72/75
Mice: E40/41/42/43
Roses / butterflies / heart: R30/32/35
Leaves: YG61/63/67
Wrapping: W00/1/3
Moon: YR30/31
Water: BG70/B25
Shading round image: BG0000/000

I hope you will pop over to As You Like It and check out the fabulously creative projects from the rest of the team :-)

Thanks for visiting and I really appreciate any comments that you leave,


Tuesday 26 January 2016

Cake and bunting

Hello lovely people,

Important date alert...Midday on 28th January is the launch of the new trio stamps from LOTV.
They are so gorgeous I would not be surprised if they sell out super fast so make sure to get your hands on them quick!
Just to get you excited, I have another sneak peek for you of one of the images from the Time for Tea trio....mmmmm, yummy cake :-)

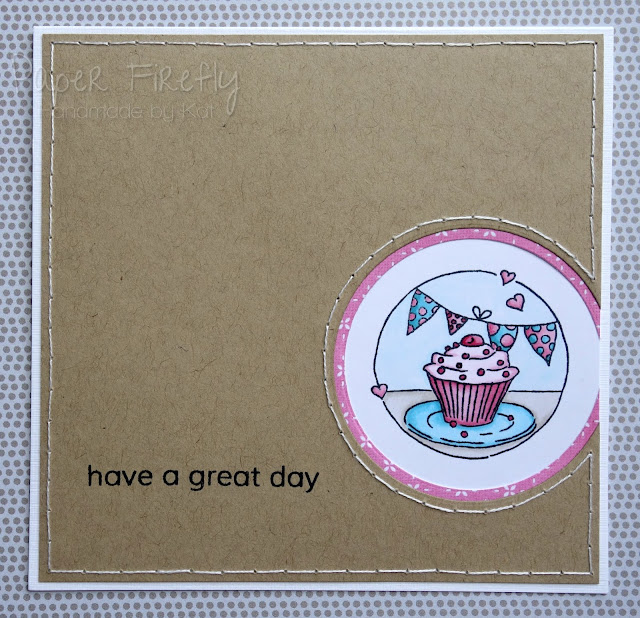
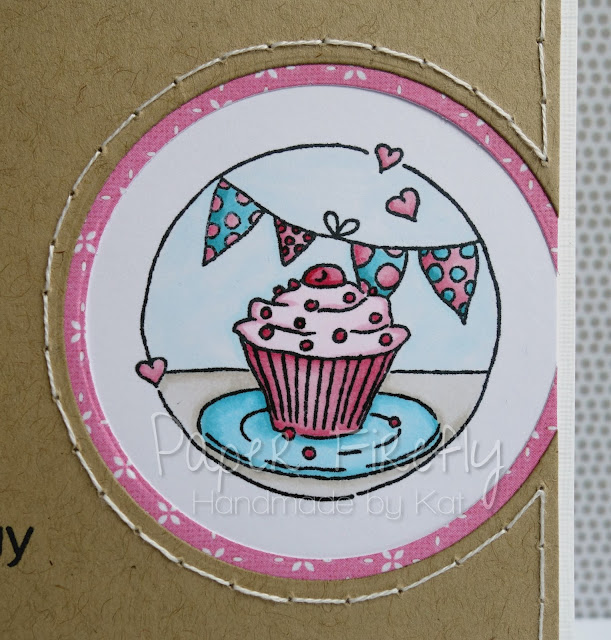
Sweet and simple card with cupcake and bunting (image from LOTV)


I had a heap of pretty papers out on my desk as I started planning this card, and I only ended up using a tiny piece of 1 paper!  Not like me at all but I had a flash of inspiration and ended up with this CAS design, which is also a nifty way to use up a scrap of DP :-)

Sweet and simple card with cupcake and bunting (image from LOTV)


All the trio images are fab and really versatile but I will always have a soft spot for anything with cake and bunting on it...two of my favourite things!

Sweet and simple card with cupcake and bunting (image from LOTV)

Card recipe;
Image: Time for tea - LOTV
DP: Pastel Dreams (retired) - LOTV
Dies: MFT Die-namics circle stax

Copic colours;
Cupcake case / hearts: R81/83
Cupcake frosting: RV0000/000/R81
Cherry and decorations: R85
Bunting: BG53/57 & R81/83
Plate: B000/BG53
Sky: B0000/000
Table: W00/0/1

Thanks for visiting and I really appreciate any comments that you leave,


Sunday 24 January 2016

Heart of hearts

Hello lovely people,

There's another weekend gone and I hope you all had a good one.

I decided to start making a few romantic cards with Valentine's Day in mind and first up I wanted to have a play with a lovely new die I bought.

I definitely find myself leaning towards CAS creations with this die as you can see...

Romantic card with lots of pink hearts

I used a pearlescent card behind the die and a darker pink heart covered with Wink of Stella popped back into one of the heart shaped holes.  I finished the hint of bling with a single tiny gem.

Romantic card with lots of pink hearts

At least I remembered to stamp the sentiment before I got too far with the card design, just in case I messed it up!

Romantic card with lots of pink hearts

Card recipe;
Dies: Heart of hearts - Impression Obsession
Pearlescent card: from stash

I'm off to Bath for 2 study days this week and then I shall be beavering away with coursework as my deadline for part 2 of my course is looming on the horizon...2 weeks to go!

I wish you all a good week ahead :-)

Thanks for visiting and I really appreciate any comments that you leave,


Saturday 23 January 2016

My craft room

Hello lovely people,

Dr. Hubby is watching the football so I thought I would take the opportunity to show you my craft room following the redecoration and revamp just after Christmas.

The first step was to paint the walls and naturally, I went for pink!  It's a very soft pink but I absolutely love it and it makes the room feel really bright :-)

This first photo shows the corner that you may have seen on a previous post and the layout of the desk and shelves is unchanged.
We put up a curtain pole, but it's not for curtains as I like as much light to come in as possible.  However, I did want somewhere to hang my bunting!


I must show you a close up of the gorgeous bunting because it was made for me by my talented sister-in-law and I love it!


Everything else in the room is new and all came from Ikea to match the existing desk and shelves.
It's quite a tricky space to furnish since it's not huge and is a slightly odd shape; the room would be square except that it has a smaller square taken out of one corner where the door is.

One of my 2 new cube units is to the right of my desk and I got some lovely bright pink storage boxes to add a pop of colour.  I still need to do a lot of organising of my stash so some of it is a  bit untidy but it's getting there!


Ok, we have now spun round by 180 degrees so you can see the second desk we put in, my second cube unit and lots more drawers.  This half of the room was all bookshelves before, which we moved to another room so I could have the whole room for crafting :-)

This second desk is unbelievably useful as I have my laptop on it so even if the main desk is covered with crafting projects, I can still get some work done or write my blog posts on the back desk.

I also do my die cutting on this smaller desk so you can see my Tonic Tangerine on the floor under the desk and my Cricut on top.


I was particularly excited to have 2 new shelves above the back desk, purely for displaying lovely handmade things that people have sent me :-)

Right now it is still full of the beautiful handmade Christmas cards I received...and 1 wedding anniversary card!

I plan to switch these out every now and then for other cards or handmade gifts so I can give them all the appreciation they deserve.


I am so delighted with my new crafting space and am very grateful to Dr. Hubby for his help in getting it just how I wanted :-)
I hope you enjoyed a little peek into it!

Now to go and make a lovely crafty mess on that desk...it's looking far too tidy on those photos!
I hope you are all having wonderful weekends whatever you are up to :-)

Thanks for visiting and I really appreciate any comments that you leave,

Thursday 21 January 2016

Sparkly Tilda

Hello lovely people,

Well, I had a really nice day yesterday having my coffee date with Dr. Hubby, a little bit of baking, a lot of crafting, and dinner and a catch up with a wonderful friend :-)

It's back to coursework for me today but there is a cake sale in work so I'm sure that will motivate me a little ;-)

But now it's time for a new challenge at In The Pink and our theme this time is...

BLING IT ON!

So show us all those gorgeous sparkly cards and don't forget we want to see more pink than any other colour!

Our fabulous sponsor this time is Dies to Die For with a £10 voucher


For some reason I struggle with bling but I was really happy with this card until it came to photograph it as I couldn't get the sparkle to show properly...we've all been there!


I really enjoy paper piecing the dress on this image but I always add some shading to it with Copics otherwise it looks too flat.
I added Glamour Dust to the feather in her hair and to the stars and dots round the image; I think you can see a hint of it in the photo!


I also added some Glamour Dust to all the flowers and tiny gems to the ends of the die cut swirls, so this card is really sparkly IRL I promise!


Card recipe;
Image: Tilda in Evening Dress - Magnolia Rubberstamps
DP: Crea Diem - Maja Design (available from Live and Love Crafts)
Dies: Fancy flourish - MFT Die-namics
Sentiment: A little sentimental - Clearly Besotted

Copic colours;
Skin: E000/00/21/11/04 & R20
Hair: E50/53/57
Dress shading: RV91/93/95
Champagne: YR30/31

If you haven't already done so then do pop over to In The Pink and check out the gorgeous creations from the rest of the Pink Ladies.

Thanks for visiting and I really appreciate any comments that you leave,


Challenges I am entering;

Wednesday 20 January 2016

Fairy with presents

Hello lovely people,

Happy Wednesday!  I do like Wednesdays because it's Dr. Hubby's day off so we will be heading out for a coffee date this morning and then I usually get in some crafting time while he plays/makes computer games :-)

While I enjoy making a mess in my craft room, it's time for a new challenge at Creative Inspirations and we have the theme...

ANYTHING GOES
(+/- optional sketch, which you can find on the sketch page)

Our sponsor this time is All Dressed Up with a prize of 2 digi images of the winner's choice.


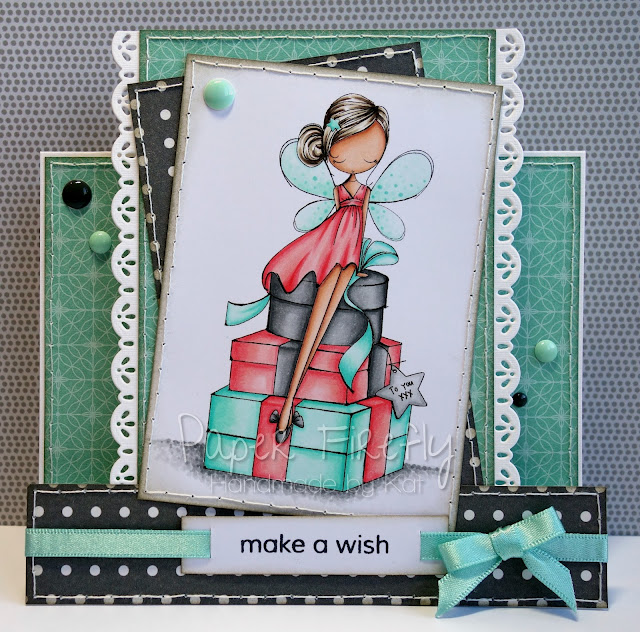
I decided to create a stepper card since I haven't done one for a while, but I'm afraid I didn't have time to write a tutorial for it.  Watch this space though because I love how it turned out so just might have to do another one!

Here's a little tip though; I created more space on the central panel of my card by adding a piece of card a bit larger than the panel on the base card and giving it some fancy edges.

Stepper card featuring fairy with a pile of presents (image from ADU)

I picked the colours for this image to match the papers I had chosen and then I didn't actually use any of the papers with the salmon pink colour, but I do think it makes a nice contrast with the mint green and grey.

This sweet fairy is actually a Christmas image but I think she makes a nice birthday card too!

Stepper card featuring fairy with a pile of presents (image from ADU)

I kept this card pretty free of embellishments to give it a fresh modern feel but did sprinkle a couple of enamel dots on there...I always mean to use these more often!

Stepper card featuring fairy with a pile of presents (image from ADU)

Card recipe;
DP: Cottage living (by Jen Hadfield) - Pebbles
Dies: Old Swedish lace - Magnolia Doohickeys
Sentiment: A little sentimental - Clearly Besotted

Copic colours;
Skin: E000/00/21/11/04 & R20
Hair: E41/43/47
Dress / presents / ribbon: R30/32/22
Wings / presents / ribbon: G0000/000/00/BG32
Present / ribbon: T2/3/4/5
Star label: T0/2/3
Ground: T0/1/2/3/4

The DT have made some wonderful samples to inspire you so pop over to Creative Inspirations to take a look :-)

Thanks for visiting and I really appreciate any comments that you leave,


Challenges I am entering;
The Ribbon Girl - any image

Sunday 17 January 2016

A tea time tutorial

Hello lovely people,

I'm here to showcase some LOTV products today as part of the Design Collective and I have a sneak peek for you of some brand new trio stamp sets coming out at the end of January.

Since my trio of images was tea-themed, they inspired me to make teabag shaped cards and I thought I would show you how I made them with a step-by-step picture tutorial.

Here's the pair of cards I made; they are quite dinky and as you can see, I have used just 2 of the images from the set.

Teabag shaped cards with LOTV Tea for two stamps

I started by cutting a 23 x 8.5cm strip of white linen card and scoring a crease down the middle.
I then scored diagonal lines from 1.5cm in along the middle crease to 2.5cm along the edge of the card from the middle crease.


As I folded the card in half I pushed the diagonal folds inside the card.


I like the way the little folds at the top give it a teabag style feel but if you didn't want to do the folding you could just cut the corners off a regular rectangular base card.


I cut an 11.5 x 8.5cm rectangle of DP to cover the front and used the card base to mark where the corners needed to be cut off.


For the shaped top piece I cut a 5.5 x 2.5cm rectangle of DP and cut the corners off as shown below.  This piece is the same pattern as the main front piece but of course, the pic below is the back of it!


I cut a 2.5 x 2.5cm square of DP to match the main piece and a 5.5 x 8.5cm rectangle of contrasting DP for the strip across the middle.
I inked all the edges with Gathered Twigs Distress Ink.


I added stitching to the 3 largest pieces of DP and you can see where I didn't bother to stitch along the middle of the main piece where it will be covered by the stripy strip!

I added die cut borders to the central strip and mounted my coloured image onto Kraft card.

I didn't want to stitch the tiny tag square so just poked some holes round it instead and added a Kraft heart.


I glued the main DP layer and stripy panel to the card base at this point.

I put 1mm foam pads on the back of the image panel, the top piece and the tag, making sure to leave a gap at the top of the 2 smaller pieces to allow room for the staples.

I tucked one end of an 18cm length of twine under the foam pad of the tag square.


I attached the image circle to the centre of the stripy panel on the card.

I added the staple to the top of the tag and then stuck that in place on the front of the card.


I could then see exactly what length of twine looked good to me, trimmed it down and stapled it in place on the top flap.

Finally I attached the top piece with the foam pad and a line of glue just along the very top to add dimension.


And then it's done!  I had lots of fun making these and hope you enjoyed the tutorial.

Teabag shaped cards with LOTV Tea for two stamps


Card recipe;
Image: Tea for Two Trio - LOTV (coming soon!)
DP: Vintage Autumn basics - Maja Design (available from Live and Love Crafts)
Dies: Heart flower lace - Magnolia Doohickeys, Mini heart collection - Memory Box, Circle stax - MFT Die-namics

Copic colours - teacup image;
Teacup: B91/93/95
Saucer: W00/0/1/3
Teacup spots / saucer rim / flowers: R56/59
Tea: E30/31/33
Biscuit: E25/27
Tablecloth: BG90/93/96

Copic colours - cupcake image;
Cupcake case: RV91/93/95
Cupcake frosting: RV0000/000/91
Bunting: RV91/93/95 & BG90/93/96
Hearts / cherry: RV93/95
Tablecloth: BG90/93

I hope you all had fabulous weekends whatever you were up to :-)

Thanks for visiting and I really appreciate any comments that you leave,


Challenges I am entering;

Thursday 14 January 2016

Lovely bubbly

Hello lovely people,

Brrrrr, it's a bit chilly here in the UK but at least yesterday the rain stopped and there was quite a bit of sunshine!

I thought I would be scraping the ice off the car before heading into the hospital today but amazingly there was no frost.
I am going in lots this week to try to build up the practice hours I need for my course.

While I am exercising my little grey cells (yes, both of them!), we have a new challenge for you at As You Like It and our theme this time is...

YOUR FAVOURITE...
Paper or non-paper project
...and don't forget to tell us why it's your favourite!

Our sponsor this time is Digi Stamp Boutique with a £10 voucher

It has to be paper for me as I don't do any non-paper crafts and I do love my pretty papers, especially the pink ones!
This design is pretty restrained on the paper front for me as I thought the image suited a clean modern look.

Girly celebration card featuring Party Zara by Digi Stamp Boutique


I am rather partial to some bubbly too and I think this pretty lady has the right idea with that HUGE glass!


Card recipe;
DP: from stash
Punch: Double dot - Martha Stewart
Charm: Daisy chain - The Hobby House
Sentiment: created with magazine freebie letter stamps

Copic colours;
Skin: E000/00/21/11/04 & R20
Hair: Y21/YR23/E15/E18
Eyeshadow: RV0000/000/32
Dress / flower / shoes: RV32/34/R56
Bottle: YG93/95/97/99
Bottle label: YR30/31 & Y26/28
Champagne: YR30/31
Ground: W00/0/1/2/3/4

I hope you will pop over to As You Like It and check out the fabulously creative projects from the rest of the team :-)

Thanks for visiting and I really appreciate any comments that you leave,


Tuesday 12 January 2016

Guesting for The Paper Nest Dolls with Mermaid Ellie

Hello lovely people,

Just before Christmas I was asked by Christine of The Paper Nest Dolls if I fancied doing a guest card for her...Errrrr, YES PLEASE!

I also took the opportunity to do the first of my fancy fold tutorials with a gatefold design.
Well, I say tutorial, but it's so easy it doesn't really need much explaining!

First here's my card in it's closed form;

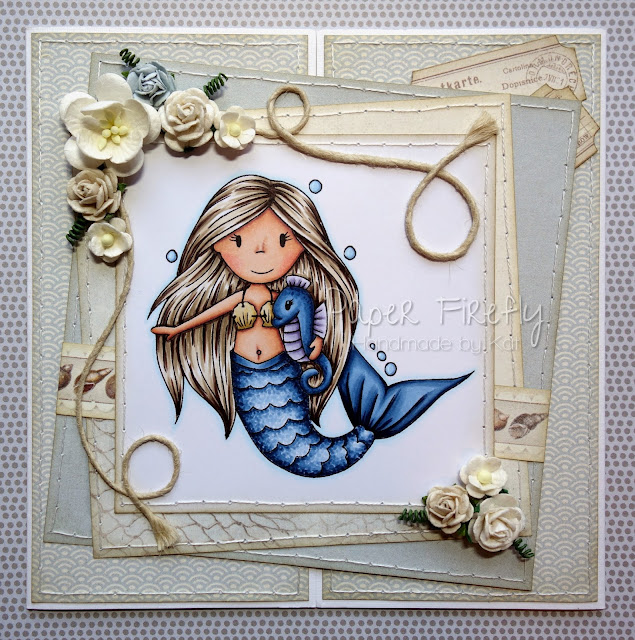
Gatefold card featuring mermaid Ellie by The Paper Nest Dolls


I like to make the base up from scratch for this design, starting with a piece of card 11.5 x 5.75 inches and scoring at 2 & 7/8 inch in from each side.

If you don't have large enough cardstock to cut this in one piece, you could overlap two 5.75 inch square base cards and cut down the front flaps.

Alternatively, use a single 5.75 inch base card, open it out and score the folds as above, then cover the extra fold in the middle with DP.


I like to add a large panel to the left hand side which can be decorated with paper layers and embellishments.
It still stands up just fine I promise!
See...

Gatefold card featuring mermaid Ellie by The Paper Nest Dolls

The right hand flap needs to be left fairly free of embellishments so the card can still close properly but there is just room on this design for a pair of tickets.

On other gatefold designs I have made the panel sticking out from the left hand side smaller to allow room for 3D embellishments on the right hand panel too.


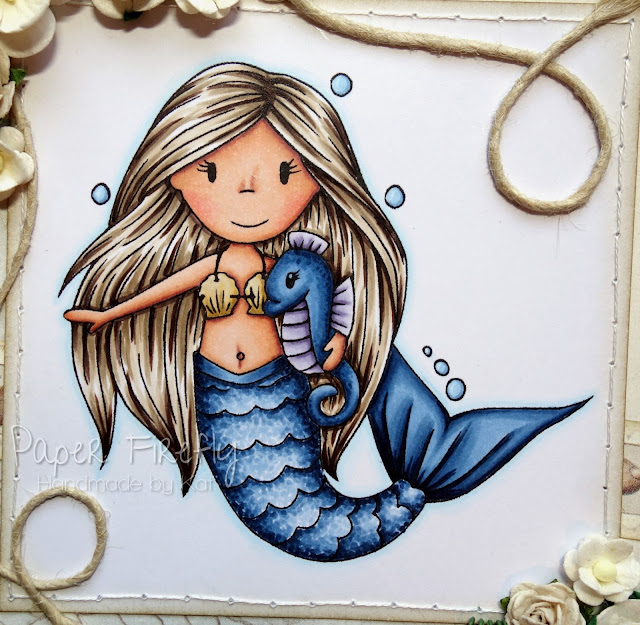
The mermaids are some of my favourite Paper Nest Dolls and mermaid Ellie has assured me she is ready for her close up so here we go...

Gatefold card featuring mermaid Ellie by The Paper Nest Dolls

The twine on here is from my stash but I think it came from some clothes I bought; it was used to attach the labels on them.
I have just curled it into shape and stuck it down with tacky PVA, then frayed the ends slightly.

Gatefold card featuring mermaid Ellie by The Paper Nest Dolls


Card recipe;
DP: Shoreline Treasures - Pion Design (available from Live and Love Crafts)
Flowers: Wild Orchid Crafts
Twine: from stash

Copic colours;
Skin: E000/00/21/11/04 & R20
Hair: E41/43/47
Shell bikini: YR30/31/Y26
Tail: B91/93/95/97/99
Seahorse: B91/93/95/97 & V20/22/25

I hope you enjoyed my tutorial of sorts and maybe next time I will move on to a fancier fancy fold design!

Thanks for visiting and I really appreciate any comments that you leave,