Friday 22 February 2019

Birthday cake with sass

Hello lovely people,

Sometimes I feel like stamping and sometimes I feel like die cutting...and today for my Dies to Die For DT card I've gone with die cutting.

Handcrafted birthday cake card with sassy greeting (using Birthday cake die-namics and Sassy Pants birthday greetings from MFT)

I love how well this birthday cake die pairs with the Sassy Pants greetings :-)

Handcrafted birthday cake card with sassy greeting (using Birthday cake die-namics and Sassy Pants birthday greetings from MFT)

An oh, the different colour combos you could choose for this cake...so many possibilities!

I've put some Nuvo drops in the holes of the black layer, but you could add different coloured card behind or leave it with the white showing through.

Handcrafted birthday cake card with sassy greeting (using Birthday cake die-namics and Sassy Pants birthday greetings from MFT)

If I've tempted you with any of the lovely supplies I've used then you can go straight to the individual products via the links below or just pop over to Dies to Die For and have a little browse around!

Thanks for popping in and I hope you have a fabulous day!


Friday 15 February 2019

3 ways with a pretty floral wreath stamp

Hello lovely people,

I'm bringing you a triple whammy for my Dies to Die For DT inspiration this week!

Isn't it great when a stamp and/or die set inspires you so much that you instantly have a trillion ideas for how you want to use it?

That's how I felt when I saw this beautiful stamp and die set from Pretty Pink Posh, so I wanted to showcase just a few ways to use it :-)

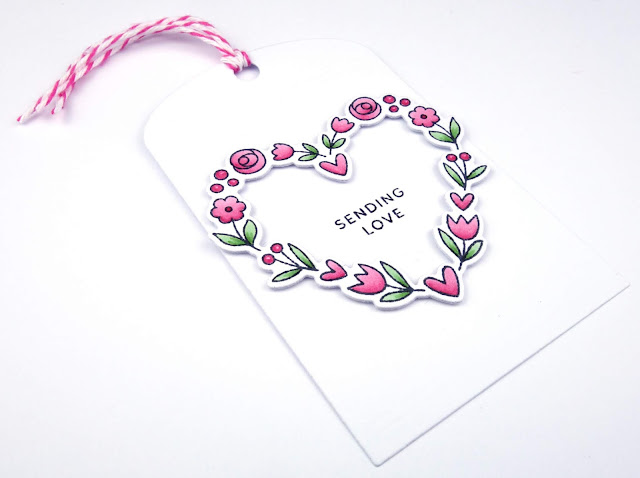
Handcrafted cards and tags with pretty floral wreath (stamps/dies are Floral Hearts by Pretty Pink Posh)

For this card I stamped the outer wreath and central element onto separate pieces of white stamping card and coloured them.

Then I cut the outer wreath into a square and layered the central piece into the middle using foam pads.

Handcrafted cards and tags with pretty floral wreath (stamps/dies are Floral Hearts by Pretty Pink Posh)

I've used both the outer wreath and central element for this second card as well, but stamped them both on the same piece of stamping card, then coloured them and cut the whole thing out with the outer edge die.

Again, I've layered the piece onto the card with foam pads for dimension and this time I've added one of the little sentiments underneath.

Handcrafted cards and tags with pretty floral wreath (stamps/dies are Floral Hearts by Pretty Pink Posh)


Finally, for my tag I stamped just the outer wreath, coloured it and cut out with the wreath die.

I stamped a sentiment onto the tag and layered the wreath over it using, yes you guessed it, foam pads!

Handcrafted cards and tags with pretty floral wreath (stamps/dies are Floral Hearts by Pretty Pink Posh)

As you can see, I kept the designs simple because my main aim was to show some different ways to use the stamps/dies...oh, and because I like it CAS - lol!

There are even more ways to use this set but I think that's quite enough for now!

If I've tempted you with any of the lovely supplies I've used then you can go straight to the individual products via the links below or just pop over to Dies to Die For and have a little browse around!

Thanks for popping in and I hope you have a beautiful day!


Friday 8 February 2019

The cutest chemists EVER!

Hello lovely people,

I was excited to do some crafting in my newly rearranged craft room (see my previous post if you're curious!) and took the opportunity to colour up some fabulous MFT stamps for my Dies to Die For DT card this week.

Valentine's Day card using MFT Cute Chemists

I've stamped the pair of cuties next to each other and stamped some of the hearts above the beakers/test tube.

I've coloured this pair up as if they were me and Dr. Hubby, with our favourite colour tops and shoes ...shhhh, this is his Valentine's Day card!

Valentine's Day card using MFT Cute Chemists

My main problem when designing this card was which of the punny sentiments to use as I love them all and I knew each and every one would make Dr. Hubby giggle...so, a good problem to have really - lol!

Valentine's Day card using MFT Cute Chemists

If I've tempted you with any of the lovely supplies I've used then you can go straight to the individual products via the links below or just pop over to Dies to Die For and have a little browse around!

Thanks for popping in and I hope you have a super day!


Lovely things I've used from Dies to Die For;
BB Cute chemists - My Favorite Things
Sweet stack 6x6 paper pad - My Favorite Things
Fancy frames squares - Sunny Studio


Other ingredients;
twine - from stash

Copic colours;

Skin: E50, E51, E21, E11
Girl's hair: E55, E57, E59
Boy's hair: E53, E35, E37
Girl's trousers: T2, T3, T4, T5
Boy's trousers: T3, T4, T5, T6
Lab coats: C00, T1
Green bits: YG03, YG25, YG17
Pink bits: R81, R83, R85
Aqua bits: B00, BG53, BG57
Purple bits: BV000, BV00, BV01, BV02
Glass: T1, T2
Ground: C00, T1, T2, T3, T4

Sunday 3 February 2019

Craft room rearrangement 2019!

Hello lovely people,

I had a fantastic day yesterday rearranging my craft room and it's now so much better :-)

I know I LOVE to see other peoples crafting spaces so thought I'd share some before and after pics of it.

The room is an L shape and I had it set up with 2 desks; this is the smaller desk opposite the window where I had my laptop set up.

I'd cleared the shelves ready for moving things round!


This is one end of my long desk under the window, which is my crafting desk.


This is the other end of the desk and the door is just off to the right hand side of this photo.


So, it was a teeny bit annoying having to switch around between the 2 desks depending on what I was doing, and I would get glare from the window on my laptop, and I just felt it could be more efficient.

So, I decided to start by moving the desks together into one big L shape and now I can have the one chair and just swivel round to whichever desk I want to use!


I moved the cube unit over to the left and had space to pop my Raskog cart over there too so it's now easier to reach.


The other end of the desk stayed pretty much as it was, although I did move the Scan 'n' Cut over to this end.


I am amazed by how much bigger the room feels!

I'm sure I will want to move a few more things around as I test out the layout over the next few weeks but I absolutely love it :-)

Thanks for popping in and I hope you enjoyed seeing what I got up to this weekend!


Friday 1 February 2019

Hydrangea baby

Hello lovely people,

Just dropping in with a Dies to Die For DT card for you today, using another one of my lovely new Stamping Bella images.

I actually squealed when I saw the images with babies in pots because they are the MOST adorable ever!

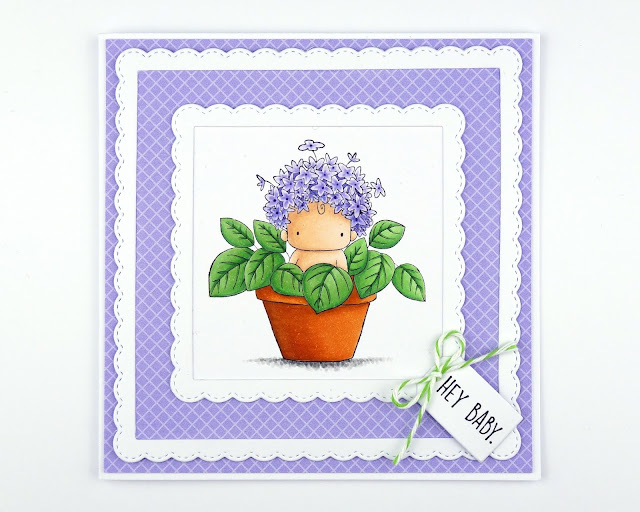
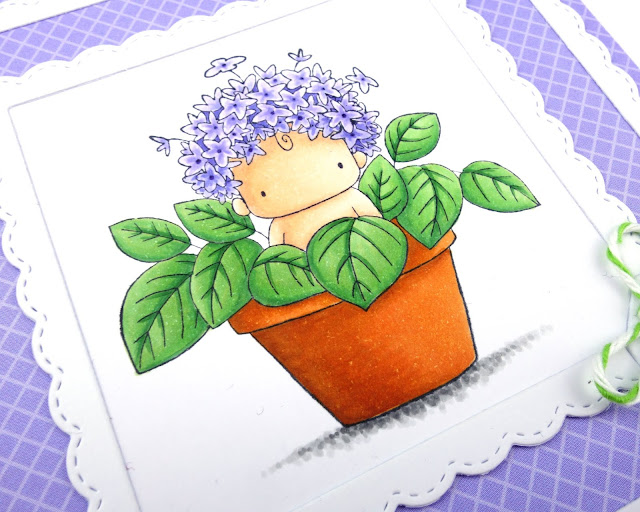
Handmade card with cute hydrangea baby in a flower pot (image from Stamping Bella)

Yes, I've used those die cut frames again 'cos they are soooo good! 

I did a bit of clever cutting so that I could get both layers of lilac DP from 1 sheet of paper; the centre layer is cut out of the middle of the base layer with just enough edge to glue the centre layer under the white frame.

I could have just layered the larger frame on top of a single sheet of DP but I prefer a little more depth in my designs so wanted the whole of the large frame layer to float above the base layer of lilac.  It's hard to tell in the photos but I definitely think the added depth just looks so much better.

Handmade card with cute hydrangea baby in a flower pot (image from Stamping Bella)

This hydrangea baby was definitely my favourite of the flowerpot babies but I did also get the cactus baby and I don't think I can rule out buying the others in the future!

I always love colouring teeny tiny flowers...yep, I'm a little weird but I'm ok with that!

Handmade card with cute hydrangea baby in a flower pot (image from Stamping Bella)

If I've tempted you with any of the lovely supplies I've used then you can go straight to the individual products via the links below or just pop over to Dies to Die For and have a little browse around!

Thanks for popping in and I hope you have a wondeful day!


Lovely things I've used from Dies to Die For;
Hydrangea baby in a pot - Stamping Bella
Gingham Pastels 6x6 paper pad - Sunny Studio
Fancy frames squares - Sunny Studio
Mini tags - Mama Elephant

Other ingredients;
twine from stash

Copic colours;

Skin: E000, E00, E21, E11
Flowers: BV0000, BV000, BV01, BV02, BV04 (teeny bit BV08 for some flower centres)
Leaves: G82, G43, G46
Pot: E97, YR27, E99
Ground: T0, T1, T2, T3