
Hello lovely people,
Just before Christmas I was asked by Christine of The Paper Nest Dolls if I fancied doing a guest card for her...Errrrr, YES PLEASE!
I also took the opportunity to do the first of my fancy fold tutorials with a gatefold design.
Well, I say tutorial, but it's so easy it doesn't really need much explaining!
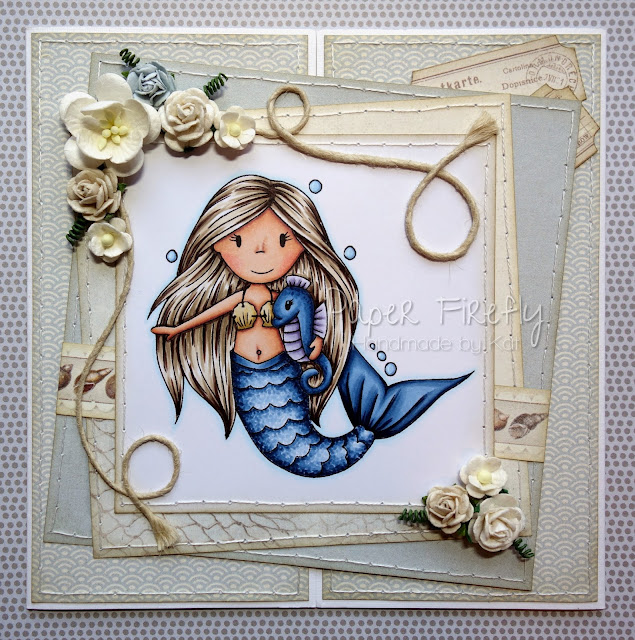
First here's my card in it's closed form;
I like to make the base up from scratch for this design, starting with a piece of card 11.5 x 5.75 inches and scoring at 2 & 7/8 inch in from each side.
If you don't have large enough cardstock to cut this in one piece, you could overlap two 5.75 inch square base cards and cut down the front flaps.
Alternatively, use a single 5.75 inch base card, open it out and score the folds as above, then cover the extra fold in the middle with DP.

I like to add a large panel to the left hand side which can be decorated with paper layers and embellishments.
It still stands up just fine I promise!
See...

The right hand flap needs to be left fairly free of embellishments so the card can still close properly but there is just room on this design for a pair of tickets.
On other gatefold designs I have made the panel sticking out from the left hand side smaller to allow room for 3D embellishments on the right hand panel too.

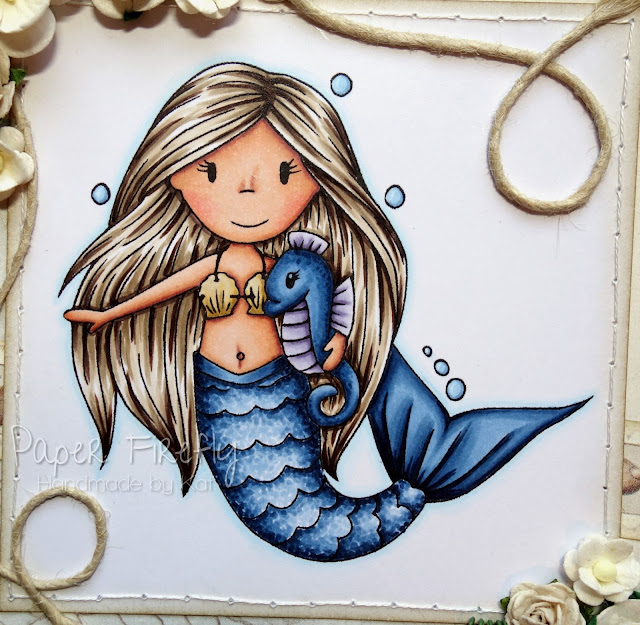
The mermaids are some of my favourite Paper Nest Dolls and mermaid Ellie has assured me she is ready for her close up so here we go...
Just before Christmas I was asked by Christine of The Paper Nest Dolls if I fancied doing a guest card for her...Errrrr, YES PLEASE!
I also took the opportunity to do the first of my fancy fold tutorials with a gatefold design.
Well, I say tutorial, but it's so easy it doesn't really need much explaining!
First here's my card in it's closed form;

I like to make the base up from scratch for this design, starting with a piece of card 11.5 x 5.75 inches and scoring at 2 & 7/8 inch in from each side.
If you don't have large enough cardstock to cut this in one piece, you could overlap two 5.75 inch square base cards and cut down the front flaps.
Alternatively, use a single 5.75 inch base card, open it out and score the folds as above, then cover the extra fold in the middle with DP.

I like to add a large panel to the left hand side which can be decorated with paper layers and embellishments.
It still stands up just fine I promise!
See...

The right hand flap needs to be left fairly free of embellishments so the card can still close properly but there is just room on this design for a pair of tickets.
On other gatefold designs I have made the panel sticking out from the left hand side smaller to allow room for 3D embellishments on the right hand panel too.

The mermaids are some of my favourite Paper Nest Dolls and mermaid Ellie has assured me she is ready for her close up so here we go...

The twine on here is from my stash but I think it came from some clothes I bought; it was used to attach the labels on them.
I have just curled it into shape and stuck it down with tacky PVA, then frayed the ends slightly.

I have just curled it into shape and stuck it down with tacky PVA, then frayed the ends slightly.

Copic colours;
Skin: E000/00/21/11/04 & R20
Hair: E41/43/47
Shell bikini: YR30/31/Y26
Tail: B91/93/95/97/99
Seahorse: B91/93/95/97 & V20/22/25
Skin: E000/00/21/11/04 & R20
Hair: E41/43/47
Shell bikini: YR30/31/Y26
Tail: B91/93/95/97/99
Seahorse: B91/93/95/97 & V20/22/25
I hope you enjoyed my tutorial of sorts and maybe next time I will move on to a fancier fancy fold design!
Thanks for visiting and I really appreciate any comments that you leave,


