Friday, 31 March 2017

Double blooms

Hello lovely people,

It's Friday and therefore time for me to tempt you all with my DT card for Dies to Die For and yes, I'm using MORE lovely new stash!

I had lined up my new MFT flower stamps and dies to play around with and came up with a basic design, but then couldn't decide which papers to use.  I had 2 choices, one very modern and one more vintage...so I thought I'd solve the problem by making 2 cards!

Here's #1...

Pink flowers in modern style, using MFT Build-able bouquet stamps and dies

I've stamped the stems directly onto the card and then paper pieced the flowers for this design

Pink flowers in modern style, using MFT Build-able bouquet stamps and dies

Here's #2

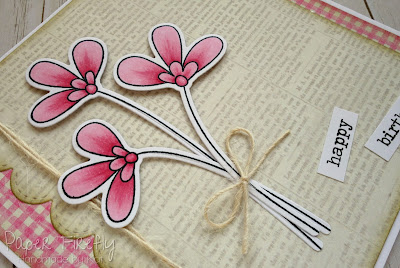
Pink flowers in vintage style, using MFT Build-able bouquet stamps and dies

This time I coloured the flowers with Copics and cut them out with the matching dies

Pink flowers in vintage style, using MFT Build-able bouquet stamps and dies

I quickly realised that it was going to take a bit of work to make sure that I got the stamping and die cutting lined up...see those fiddly little stems?!

So, I'm afraid I haven't had time to take photos but I thought I'd share my technique for getting the stamp and die cut perfectly aligned;
- die cut the outline shape from a scrap piece of card
- place the outline on the bottom pad of the MISTI
- place the stamp into the aperture of the die cut then close the MISTI lid so it picks up the stamp
- open the MISTI, place the die cut aperture back over the stamp to double check the alignment
- stamp the flower image onto your cardstock, then colour as desired
- place the die over the top and tape down then die cut
- PERFECT!!

I'm sure you could do the same technique without a MISTI but it definitely makes it a little easier.

If I've tempted you with any of the lovely supplies I've used then you can go straight to the individual products via the thumbnails at the end of my post or just pop over to Dies to Die For and have a little browse around!

Thanks for visiting and I really appreciate any comments that you leave,


Tuesday, 28 March 2017

For a tea-riffic Mum

Hello lovely people,

After working at the weekend, I had yesterday off and spent most of it ignoring the cleaning and pottering about in my craft room instead :-)

It's back to work today but of course I then have my usual Wednesday off and I'm excited that I will be spending it with my awesome buddies Sue and Debs!

I thought today I would share the card I sent to my Mum for Mothers' Day.

Tea-riffic teacup card

I have to admit to using the tea theme on more than one occasion for her but she really does love tea so I'm hoping she will also love this card!

The dies and stamps are by Stampin' Up but no longer available.

Tea-riffic teacup card

I hope you all have a good week :-)

Thanks for visiting and I really appreciate any comments that you leave,


Friday, 24 March 2017

Lighting the candles

Hello lovely people,

I have a Dies to Die For DT card for you today and it's one I made for my nephew...I didn't put an age on the card but can you guess how old he is?!

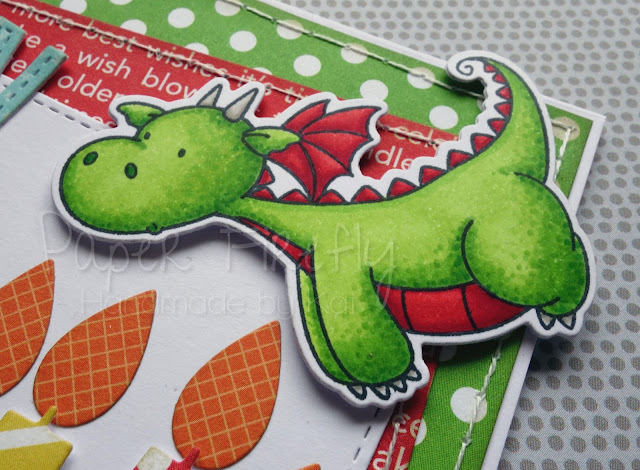
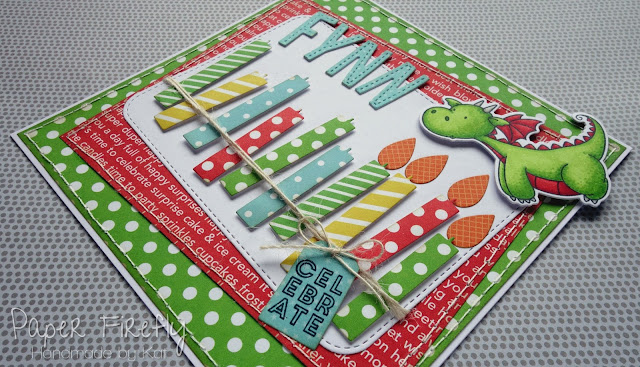
I was feeling very guilty that I have had the MFT magical dragons in my craft room for at least a couple of months and hadn't used them so I decided to team one of the dragons up with some birthday candles for a fun design.

Birthday card with dragon lighting candles


I used the matching dies to cut out the gorgeously cute dragon so I could have him flying in and lighting up the candles.  I was going to add a little flame but there wasn't really space.

Birthday card with dragon lighting candles


I have a matching stamp set for the candles but decided on this occasion to just cut the candles from DP, and I've added them to the panel with foam pads before wrapping the twine around.

I couldn't resist popping those fab stitched alphabet dies in my basket last week and along with the banner alphabet dies from my previous card, I think they will be very useful; it is lovely to personalise cards and I should do it more often.

Birthday card with dragon lighting candles

If I've tempted you with any of the lovely supplies I've used then you can go straight to the individual products via the thumbnails at the end of my post or just pop over to Dies to Die For and have a little browse around!

Thanks for visiting and I really appreciate any comments that you leave,


Copic colours;
Green: YG23/25/17 (& tiny bit of G07)
Red: R24/29/46
Horns / claws: W1/4

Lovely things I've used from Dies to Die For;


Other ingredients;
Ivory button twine - from stash

Wednesday, 22 March 2017

Sweet birthday wishes

Hello lovely people,

I am still working my way through all my lovely new stash so today I am sharing a card I made for a very lovely lady using lots of my new things :-)

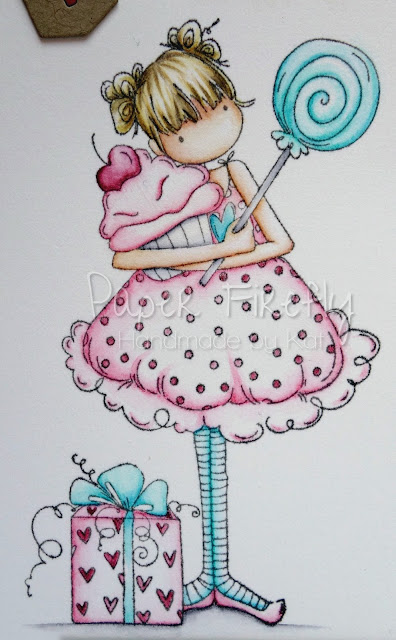
Girly birthday card using Tiny Townie Sammy is Sweet by Stamping Bella

 Since the recipient is such a master with Copics, I thought I'd send her an Inktense card - lol!  To be honest, it wasn't a conscious decision; I find the papers and image just seem to direct me one way or the other or maybe it's just whatever takes my fancy on any particular day!

Girly birthday card using Tiny Townie Sammy is Sweet by Stamping Bella

So, what's new on here?

Well, the papers, the image, the stitched fishtail banners, the stitched banner alphabet and the sentiment...yep, that is actually EVERYTHING on this card!

I am loving all this new stuff but I especially love the cute banner alphabet and I can see it's going to be soooo useful :-)

Girly birthday card using Tiny Townie Sammy is Sweet by Stamping Bella


If I've tempted you with any of the lovely supplies I've used then you can go straight to the individual products via the thumbnails at the end of my post or just pop over to Dies to Die For and have a little browse around!

Thanks for visiting and I really appreciate any comments that you leave,


Inktense colours;
Skin: Baked earth, Madder brown, Saddle brown
Hair: Tan, Saddle brown, Sepia ink
Dress: Crimson, Shiraz
Cupcake: Crimson
Cherry: Shiraz, Red violet
Cupcake case / ground: Neutral grey
Aqua bits: Green aquamarine, Mallard green

Lovely things I've used from Dies to Die For;

Sunday, 19 March 2017

Wee fairy with flowers

Hello lovely people,

I hope you are having a wonderful weekend :-)

I had a fab time catching up with an old friend on Friday night and as this post goes live I'm guessing I might be enjoying breakfast with another couple of friends after spending yesterday evening with them...or maybe I'll still be in bed ;-)

Today we have a new 'Use any image' challenge starting over on The Ribbon Girl blog, so you can enter with any type of project as long as you include an image.
There are loads of fab prizes up for grabs too :-)

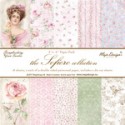
I had a lovely delivery of new goodies from The Ribbon Girl and couldn't wait to use some of them on my card...the main one being the beautiful papers.  I was delighted to see that Maja Design have re-launched the Sofiero range and you can get the 6x6 pad from The Ribbon Girl, so of course I had to have that as it was a fave of mine previously :-)

Girly pink fairy card with lots of flowers (image from Wee Stamps for Whimsy Stamps)

I realised it has been quite a while since I coloured a person with my Copics but this sweet little fairy turned out pretty well.

Girly pink fairy card with lots of flowers (image from Wee Stamps for Whimsy Stamps)


Other than the scrummy papers, the ruffle ribbon was a new addition to my collection of pink ribbons and it really is soooo beautiful :-)

I borrowed a trick from the wonderful Debs with my ribbon and instead of a bow I just cut little fishtails into the ends of a scrap of ribbon and tied it with twine.

Ooooh, and talking of details, I also replaced the yellow stamens in the cherry blossom with pink pearly ones because...well, the more pink the better, right?!

Girly pink fairy card with lots of flowers (image from Wee Stamps for Whimsy Stamps)


If you find yourself tempted by any of the pretty supplies I've used then you can go straight to the individual products via the thumbnails at the end of my post or just pop over to The Ribbon Girl and have a little browse around!

Enjoy the rest of your weekend :-)

Thanks for visiting and I really appreciate any comments that you leave,


Copic colours;
Skin: E000/00/21/11/04 & R20
Hair: E50/53/55
Dress: W00/0/1/3
Wings: RV0000/000/R81
Flowers / slippers: R81/83/85
Leaves: G40/YG61/YG63

Lovely things I've used from The Ribbon Girl;


Other card ingredients;
Flower fairies - Wee Stamps for Whimsy Stamps
Spring foliage - Suw Wilson for Creative Expressions
Other flowers - from stash

Friday, 17 March 2017

Bloomin' Birthday

Hello lovely people,
I am sooooo happy that it's Friday and am looking forward to catching up with friends tonight and tomorrow and then a chilled out Sunday.

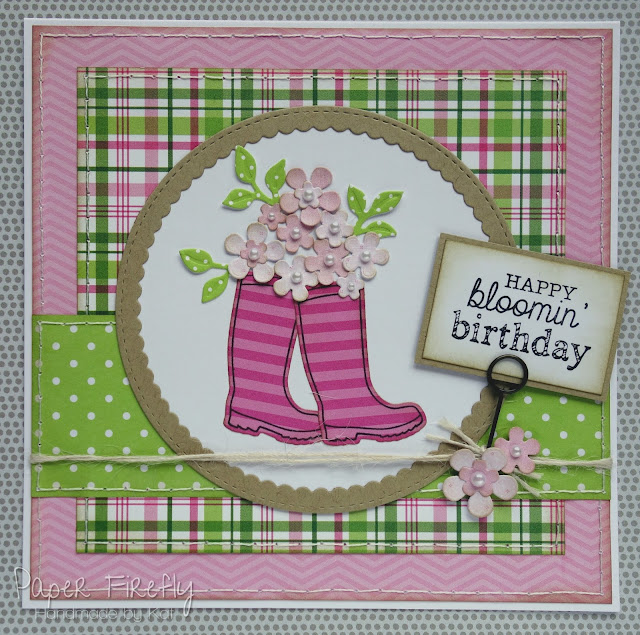
 I do love Springtime with all the pretty flowers and brighter days and I think this is reflected in my Dies to Die For DT card this week!

Card with flowers in welly boots, using Bloomin' Boots stamps/dies from Taylored Expressions and a mix of MFT and Lawn Fawn papers
The stamp set I used has some lovely patterned welly boots but I chose the plain version for my card so that I could stamp them on the stripy DP...and ooooh, I would LOVE a pair of wellies like these!

The sentiment is also from the set and I've tucked it into a memo pin, then used flowers to cover the sharp end.

Card with flowers in welly boots, using Bloomin' Boots stamps/dies from Taylored Expressions and a mix of MFT and Lawn Fawn papers

I've been mixing and matching MFT papers again, so the chevron and stripy boots are from the Sweet Celebration pad, the plaid is from (unsurpisingly!) the Plaid patterns merry & bright pad, and the green spotty is from the Lucky Prints pad.  Phew, that's a lot of pads...but isn't it fab how well they go together?

Oh, and the leaves are from a Lawn Fawn pad called Let's Polka in the meadow, and the flowers are scraps from my stash!

Card with flowers in welly boots, using Bloomin' Boots stamps/dies from Taylored Expressions and a mix of MFT and Lawn Fawn papers

If I've tempted you with any of the lovely supplies I've used then you can go straight to the individual products via the thumbnails at the end of my post or just pop over to Dies to Die For and have a little browse around!

I wish you all a fabulous weekend whatever you are getting up to :-)

Thanks for visiting and I really appreciate any comments that you leave,